 Setting Default Field Values in Sage X3 ERP

To save time during record creation it is possible to default certain field values in Sage X3. This blog post will walk through how to default the Validity Date field during quote entry. We’ll also discuss creating and assigning activity codes to ensure changes are not lost during patches and upgrades.
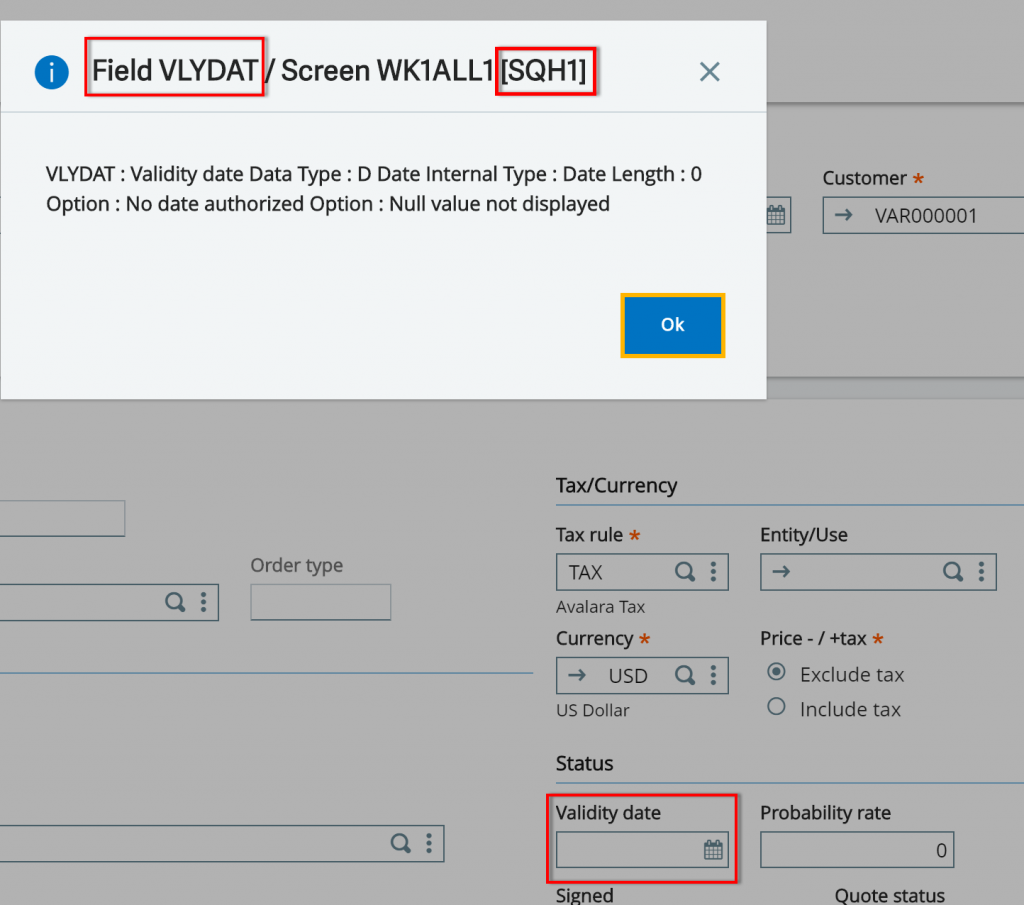
Find the screen and the field value:
Follow: Sales > Quotes > Quotes
1. Select the Validity Date field
2. Select ESC F6 on your keyboard
3. Record the field value and the screen value in [brackets]

Default Value Setup:
A default value is set at the screen level. At this level it is also possible to make a field mandatory. These changes will require a dev badge be assigned to the user. In addition, it is suggested that an activity code be added so that these changes are not lost during patching and upgrades.
Follow: Development > Script Dictionary > Screens > Screens
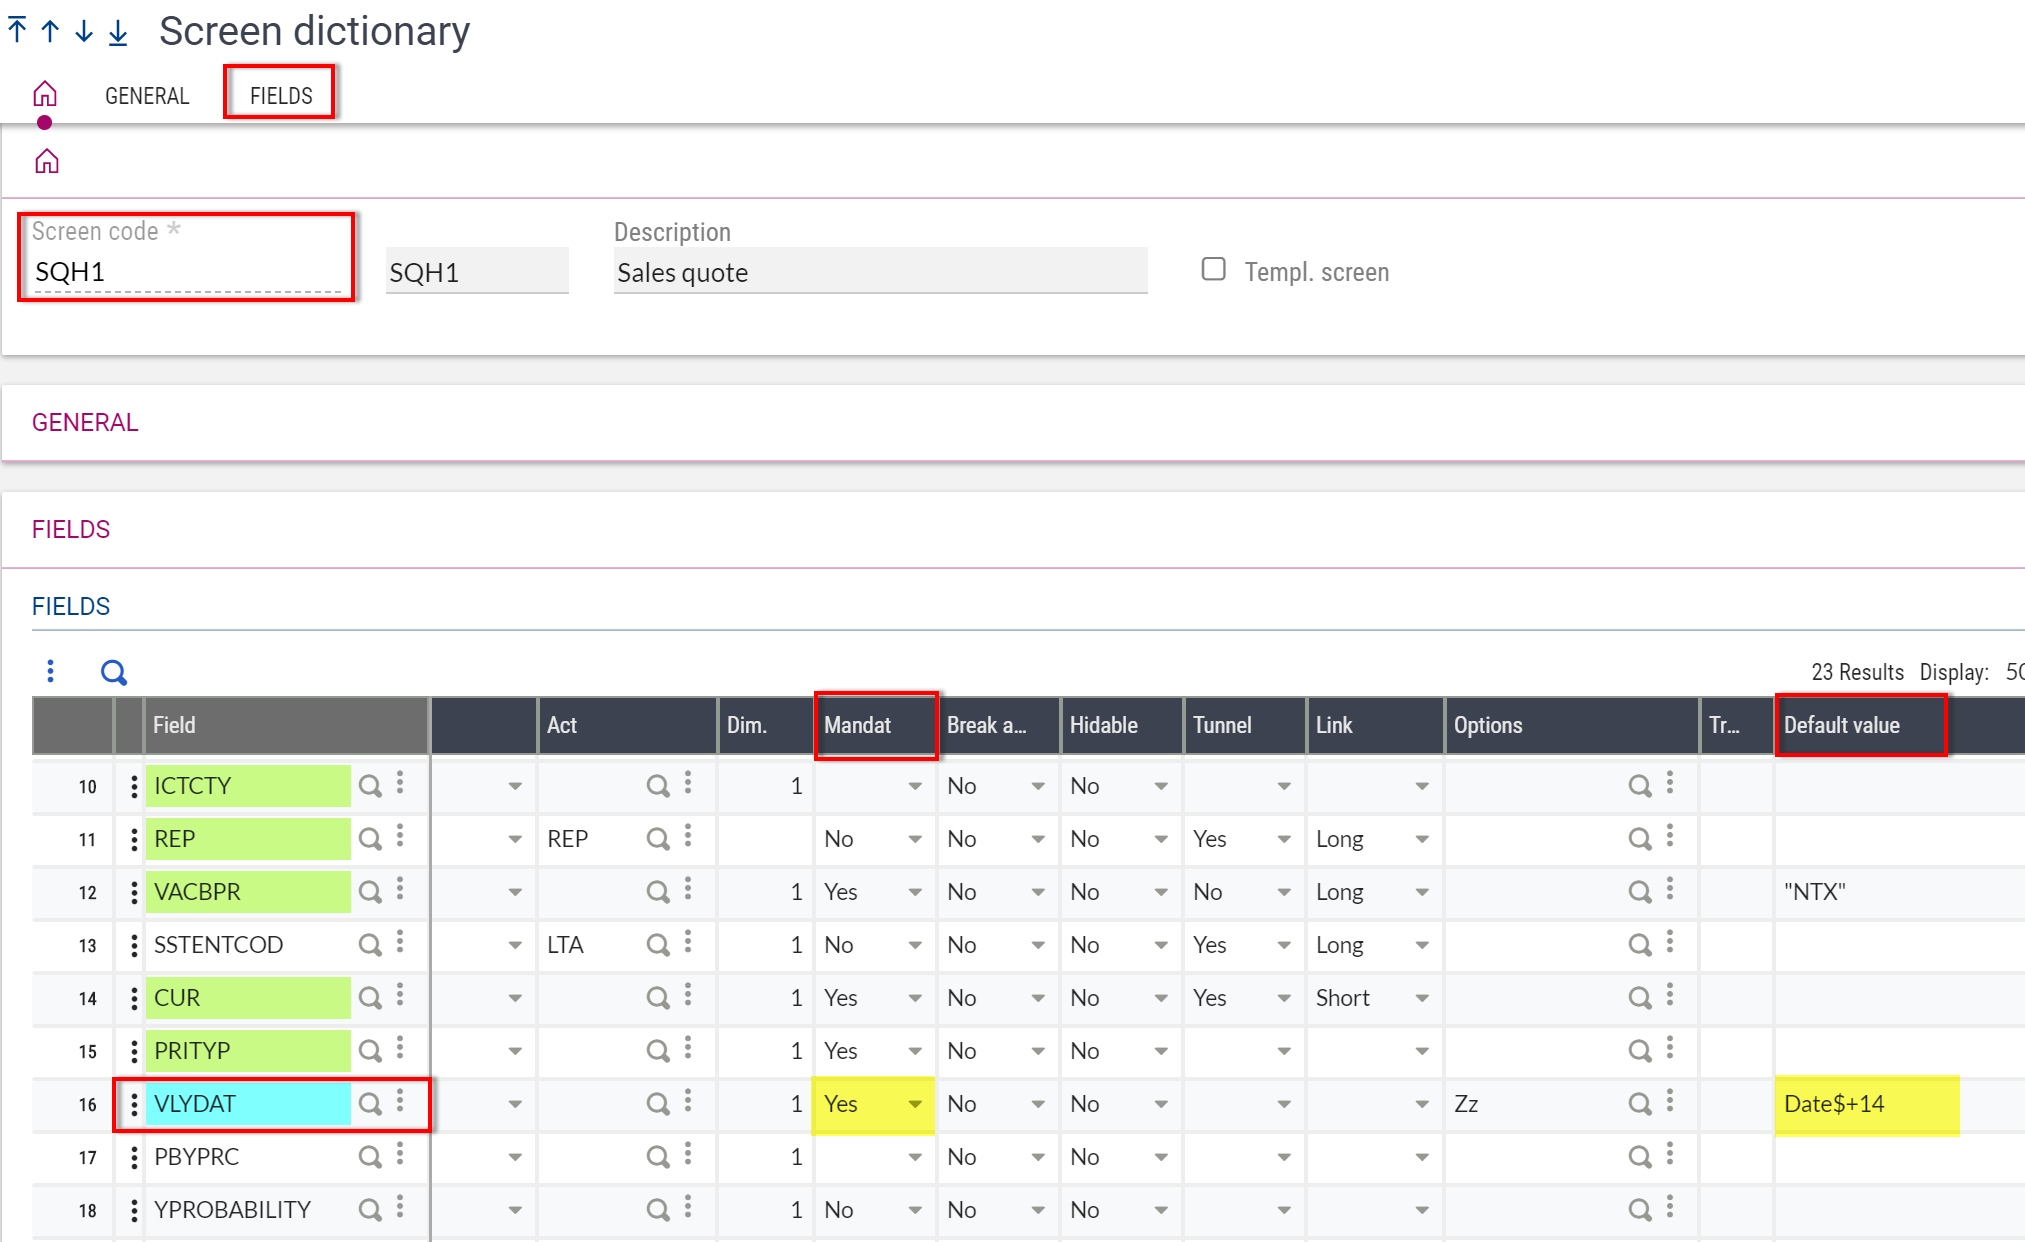
1. Select the screen that was recorded from the quote SQH1
2. Select the Fields tab
3. Find the field (VLYDAT)
4. Scroll over to the column titled “Default value”
5. Default values for dates
a. Date$ = Current date
b. Date$+14 = 14 days from current date
NOTE: There are defaults that the native code will override unless an * is added as a prefix to the default, this usually works to override code logic.
6. To make field entry mandatory set the drop down to “Yes” in the column titled “Mandat”
7. Save changes and validate the screen
8. For transactional screens, this change will require validating all the related entry transactions

Validating Entry Transactions:
For sales quotes Follow > Setup > Sales > Entry Transactions > Quotes
- Select the appropriate entry transaction
- Select Validation

Creating and assigning activity codes:

If there is not already an activity code used to track small changes it is easy to create a new one that can be used for these types of changes in the future.
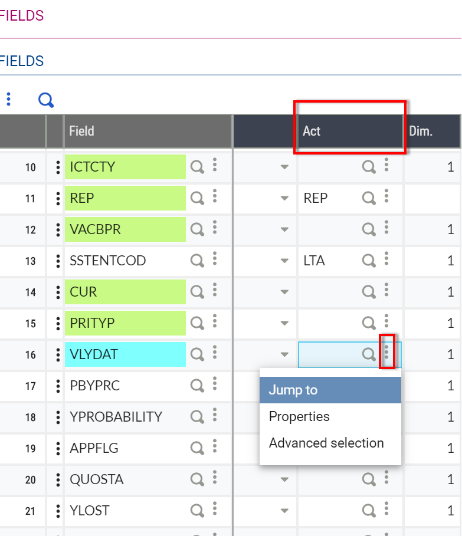
1. From the column titled “Act” select the action dots in the field
2. Select Jump to
3. Select new
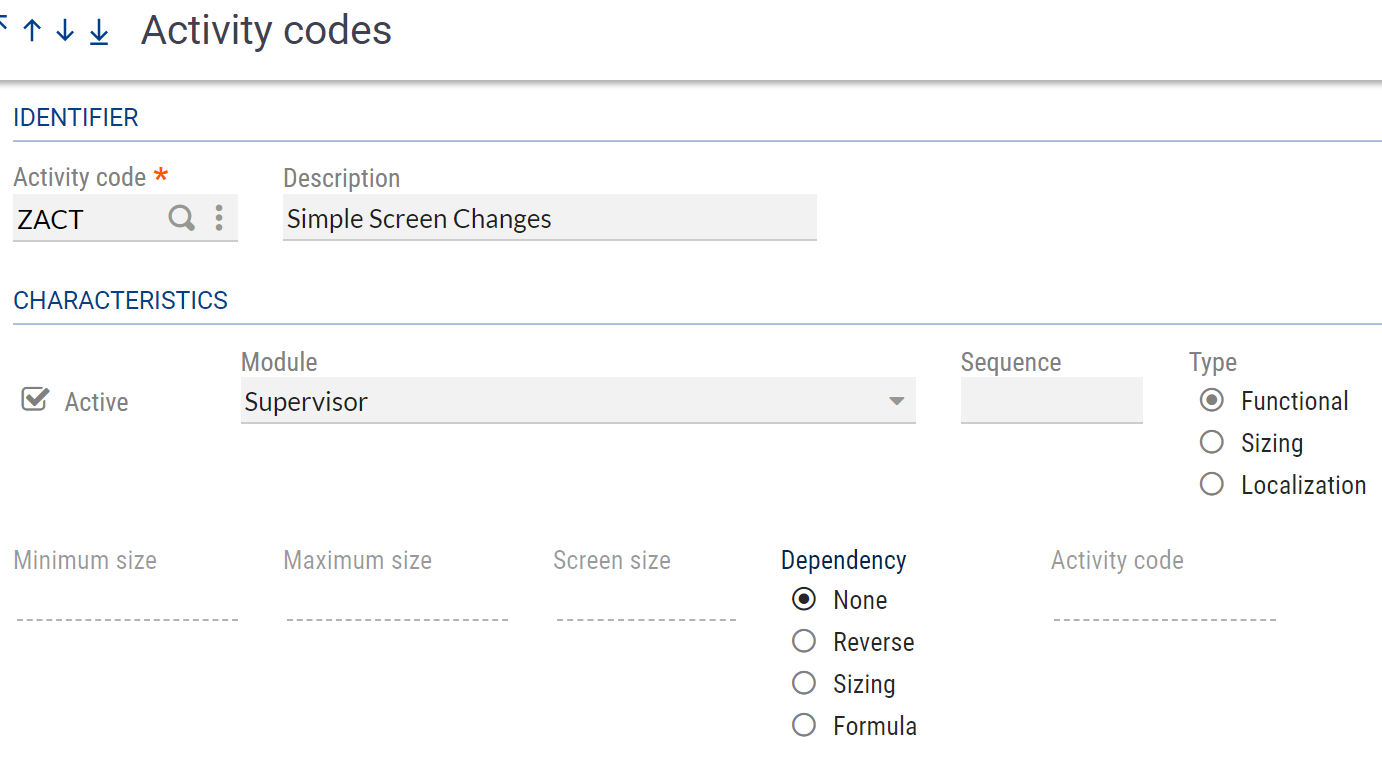
4. Enter a code beginning with Z
5. Enter a description
6. Select the Active flag
7. Module = Supervisor
8. Type = Functional
9. Dependency = None
10. Select create
11. Close out of function and the field in the screen will populate with the new activity code
12. Save changes and validate the screen

It is important to note that the above steps are specific to a date field. Depending on the data type of the field, the format of the default value will vary. For more information on data types please refer to Sage online help. In addition, this functionality is restricted to native fields and cannot be guaranteed for custom fields.
Always test these kinds of changes thoroughly in your pilot or test folder before implementing live. And always keep a log of changes made to your production environment. For questions and advice on best practices, please contact us!


