Pick Ticket Security in Sage X3
Sage X3 is a highly scalable solution – it can adapt to companies with as few as ten users and enterprise companies with thousands of users.
One of the reasons Sage X3 is so flexible is that it allows companies to process transactions from a single screen, such as in the Sales Order, or it can be configured to segregate duties for larger organizations.
In the latter case, one employee would be responsible for entering the Sales Order and another tasked with preparing the order using the Pick Ticket function; meanwhile, the shipping department is working on generating the BOL and necessary documents while the accounting department will send a separate invoice.
In companies where there’s a segregation of duties, how do you leverage Sage X3 security to prevent users from making mistakes on the Sales Order screen (for example)? How can you prevent the customer service representative from creating a Pick Ticket if that isn’t part of their job? It’s important to properly configure security to prevent this from happening.
It’s better to have procedures and security in place to catch these issues before they happen than to put in safety nets to catch problems after they’ve already happened – that slows down business and affects customer service.
Here’s how to configure your functional profile for the customer service representative so they can’t create a Pick Ticket from the Sales Order screen.
The Sales Order screen has a button in the right panel that shows the life of the order. At Net at Work, we call them validation buttons/links.
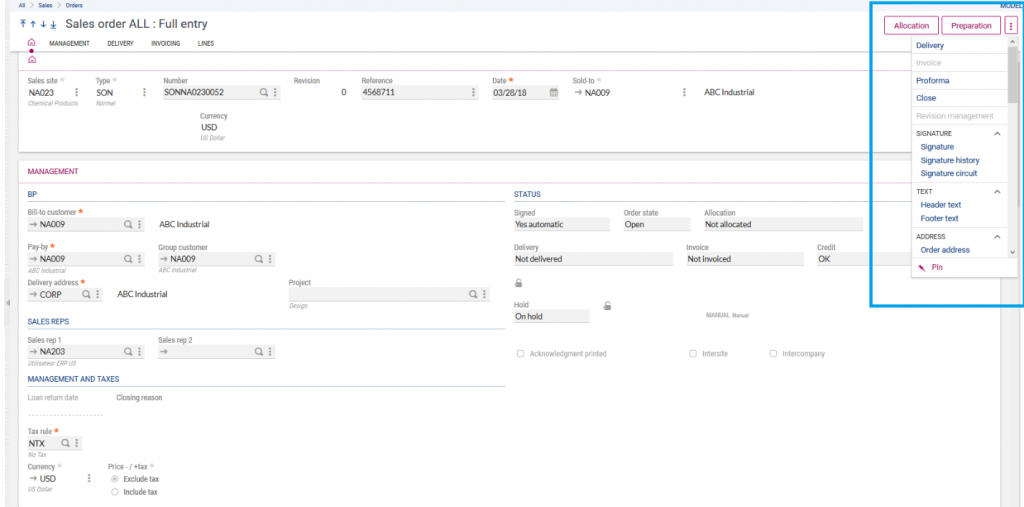
From here, you can:
- Allocate/reserve your lot and quantities to your order
- Prepare/create the pick ticket for your warehouse
- Deliver/create the documents for your shipments
- Invoice the order once the delivery has occurred
- Create a pro forma for international shipments
- Close the order
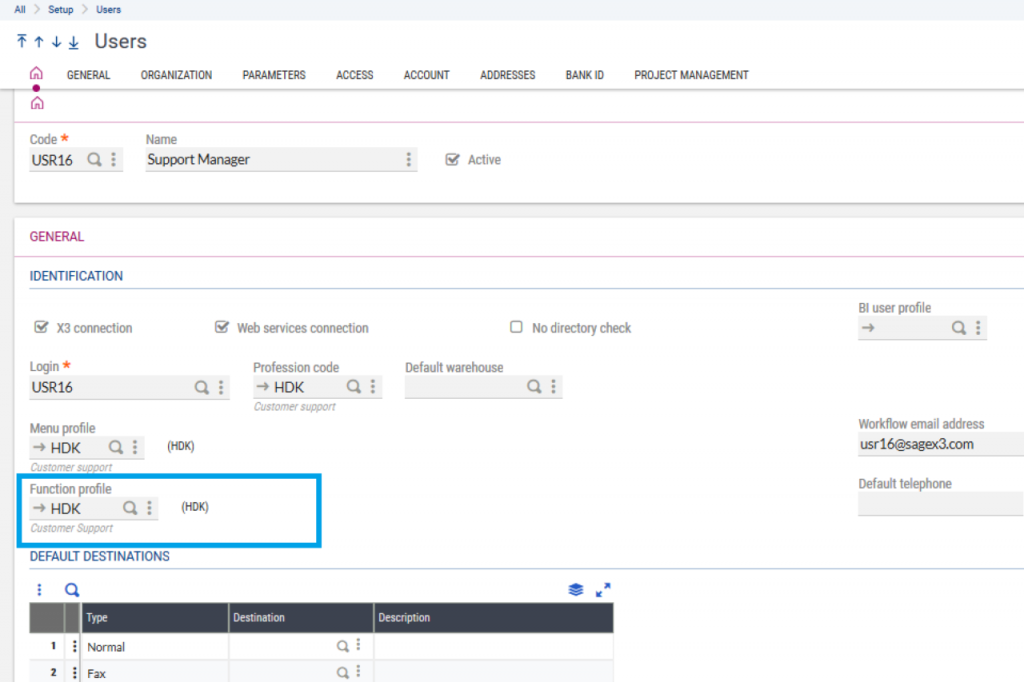
In the current process, to restrict a user from creating a Pick Ticket, locate the user in the user security function and find the functional authorization code tied to it.
Go to Setup > Users > to find the Function Profile.
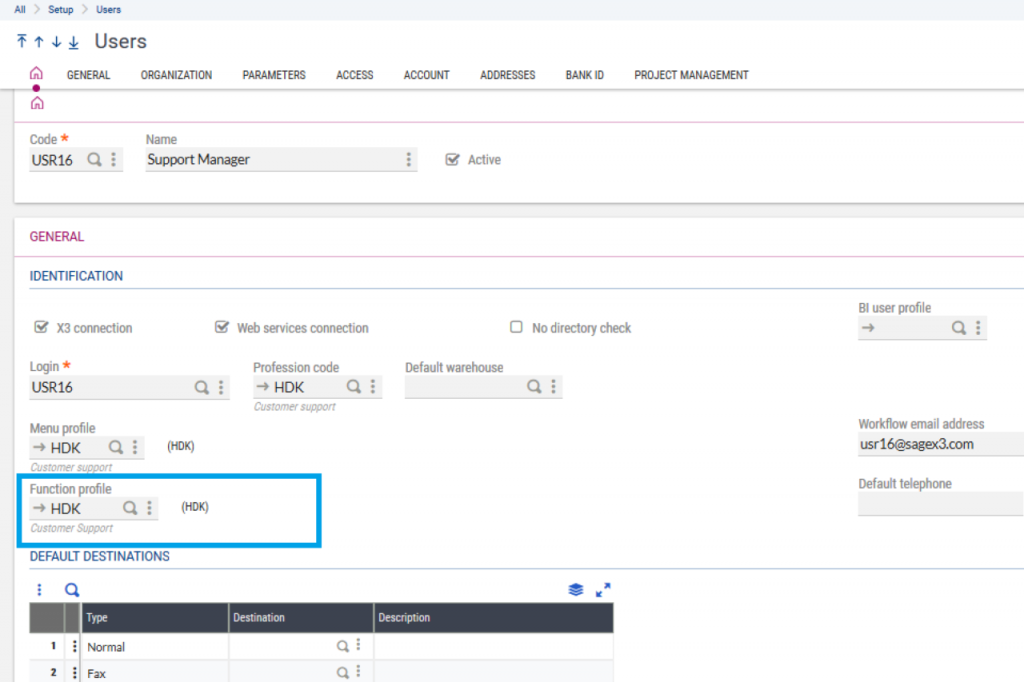
You can easily jump to the configuration of that Function Profile using ESC F9 as a shortcut while in the field.
Once there, you’ll find a button in the right panel called Authorizations. This will get you to the setup screen where you can control which buttons are allowed and which aren’t.
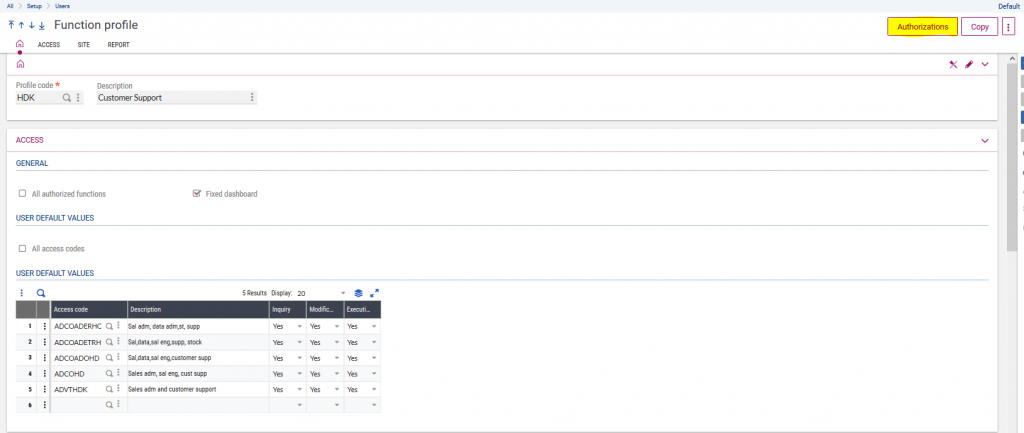
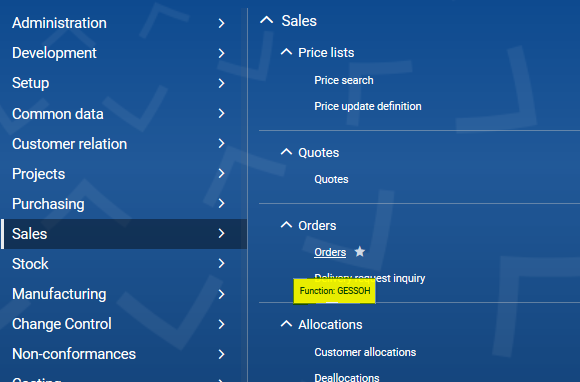
Search for the Sales Order function or GESSOH.
Quick Tip: to learn the code for the function, just place your cursor on the link in the menu structure; it will show the code in the tooltip.
On this screen, in the options section, you can read letters that are giving you access to the functionality in the right panel of the Sales Order. The options are:
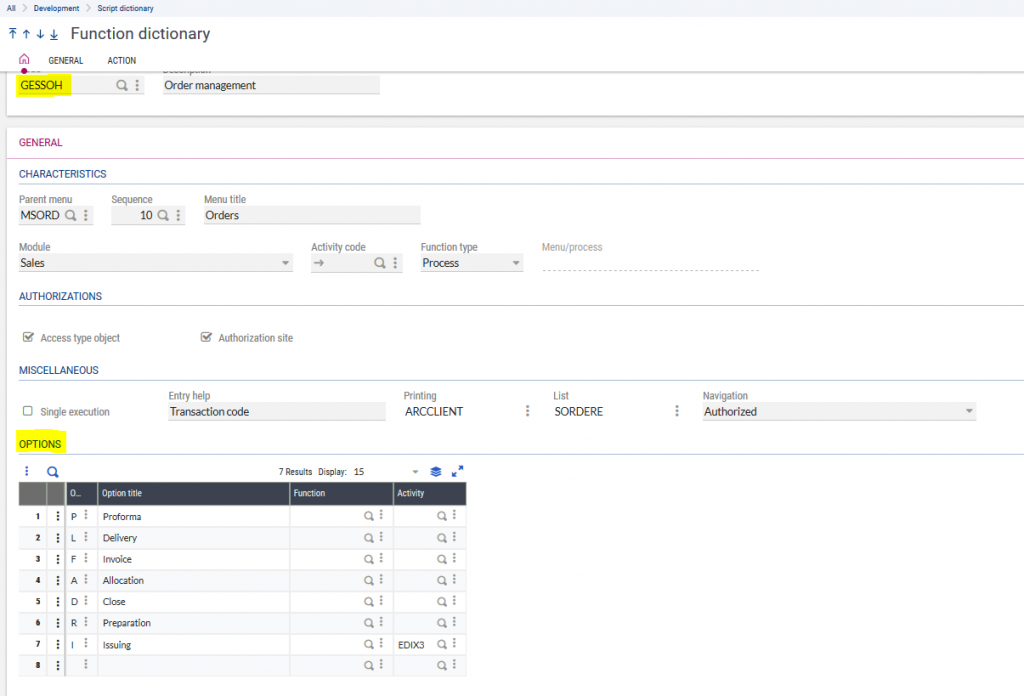
In that list, in the options column in the grid, you need to remove the R option. You also need to make sure that CONSPRH and CONSPRH2 functions (these are for the pick tickets) are not functions that the customer reps can access. Theoretically, this last step is an extra precaution, but if a user is good with Sage X3, they can call these functions using the Google search bar; for auditing purposes you want to be sure they absolutely can’t get to the pick tickets.
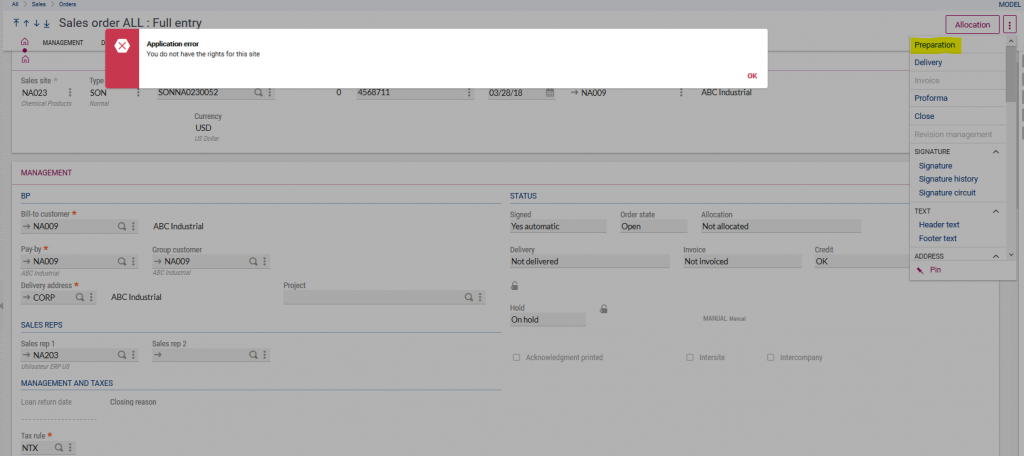
With that change, when the customer service representative logs back in the system, the link for Preparation will still be there – but if they try to click it, they’ll get the following message:
This is one of the many ways Sage X3 can scale with you.
Initially, you might need people to wear multiple hats and help enter orders and create pick tickets and invoices, but hopefully, you’ll become so successful that you’ll need to segregate duties at the security level to accommodate for the new roles and the new organization.
That’s just one of the things Sage X3 brings to the table – a solution that grows with you without having to change or customize your system. All the tools are at your disposal and can be used at any point after you go live.
Have more questions about Sage X3, creating pick tickets, or pick ticket security in Sage X3? Please contact us today.


