
Sage 100 Newsletter – Q3 2019
Keeping You Up-To-Date With Information About Sage 100
Data Analysis with Business Insights Explorer in Sage 100
You have within Sage 100 a tool that will give you the data you need quickly and with only a few clicks. You can export lists of customers whom have purchased from you in the past month, lists of invoices that are overdue, POs remaining to be fulfilled, and more with the simple Business Insights Explorer tool (aka BIE).
Most modules in Sage include an “Explore” folder which contains a handful of “views.” Each of these views can be customized and later rerun on demand, just like you would a report. The advantage of a view however, is that you can view the data easily in a grid and sort and filter on command. You can also build charts and export the data to Excel, if you prefer to further your analysis there.
To give you a jump start, we will walk through a simple example. In this installment, we’ll be creating a list of customers with open invoice balances. We will group this list by salesperson and add sub totals and a grand total.
Step 1: Open the Customer Open Invoices View found under Accounts Receivable>Explore
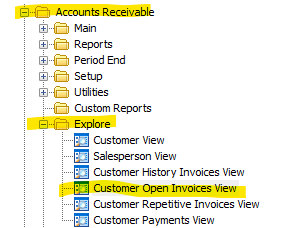
We’ve selected this view because it will list all open invoices’ balances. Side note: “Historical” views (these have the word History in their name) are often slow to run due to the amount of data they hold. So, bear that in mind as you create those types of views.
Once the view has loaded, you may receive a message like the one below indicating the default row limit has been reached. BIE views are initially limited to display only the first 2,000 records as waiting for all the data to load could literally take hours (depending on how much historical data you are retaining). We going to increase this limit.
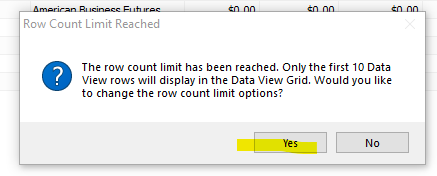
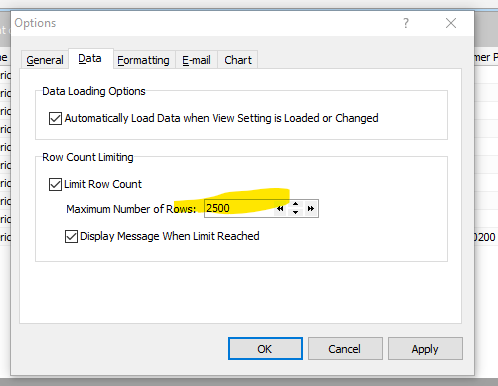
Consider the number of actual open invoices you will likely need to display in this view. (You may want to overshoot.) Click “Yes” on the message above and type that number into the “Maximum Number of Rows” box in the screen that appears. Click OK to return to your BIE view.
Step 2: Show Only Open Balances
Displayed on screen you should have a list of customer invoices. Some paid, some not. This is because the data source that drives this view happens to also hold recently paid invoices. For this reason, we must filter the list to only display invoices with a balance that is not equal to zero (assuming we want to include credit memos which will have a negative balance).
Start by clicking on the drop-down arrow in the “Balance” column and selecting “(Custom).”
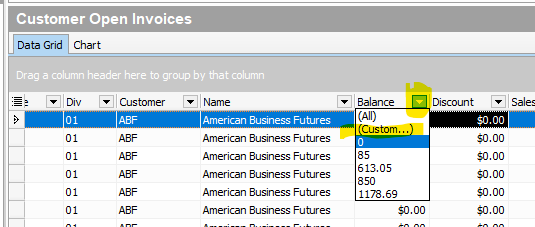
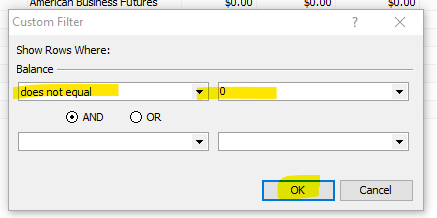
Select “does not equal” from the first drop down and type 0 into the next box. Click OK. (If you needed to display invoices over a certain amount, you could do that, too. Just choose the appropriate option from the drop down and enter the dollar value instead of 0.)
Step 3: Customize Your Columns
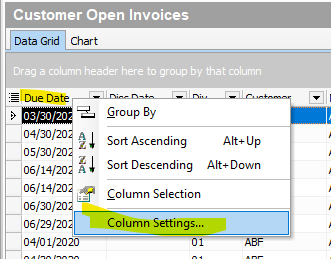
You should now have a list of invoices with open balances. You also probably have some columns that you don’t really need to see for the purposes of this view. To remove them (and to add more columns), right click on any column heading and select “Column Settings” from the menu that appears.
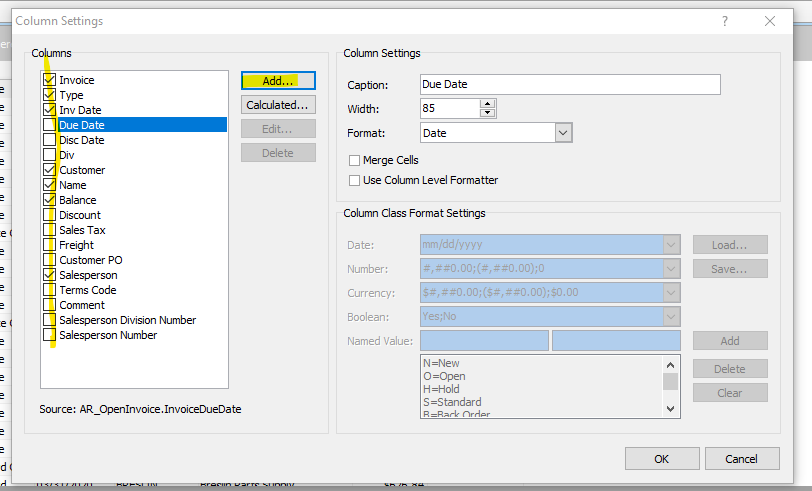
Uncheck the columns you do not want to see and check the ones you want to add. If a column you would like to add (including custom fields) is not on the list, click on the “Add” button.
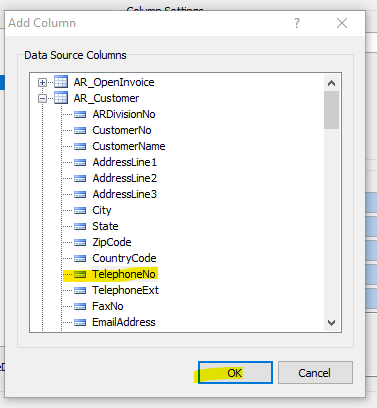
Scroll through the available data sources (tables) and fields and select the column you would like to add. Click OK and then OK again to close the Column Settings screen.
Step 4: Group and Sort Records by Salesperson
Click and drag the Salesperson column heading and drop it into the gray section/bar just above the grid, as shown in the screenshot below. This will automatically group and sort your data by salesperson.
(Note that you can also sort by clicking on any column heading.)

Step 5: Add Totals
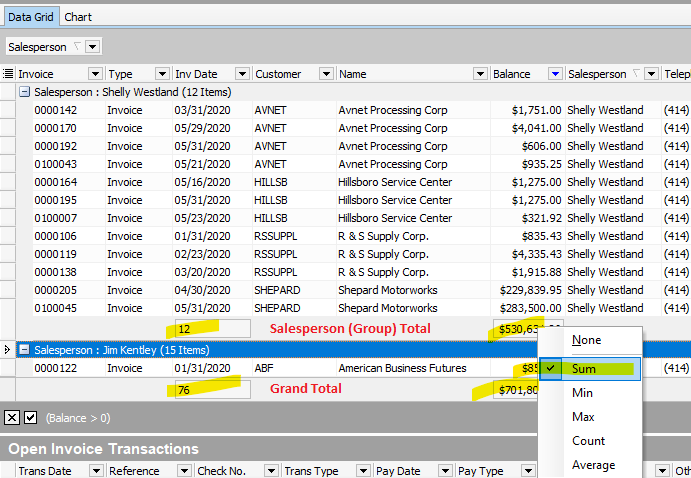
To add totals to your view, depress the Group Summary Footer and Summary Footer buttons:

This will add boxes below the columns in your view that can be summarized. You will see these under each of your groups, as well as at the end of the view where you would add grand totals.
Step 6: Save Your View
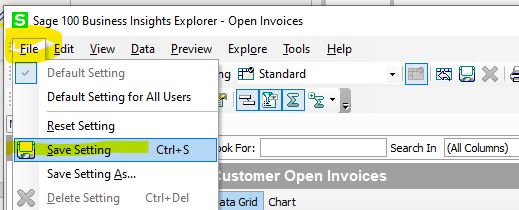
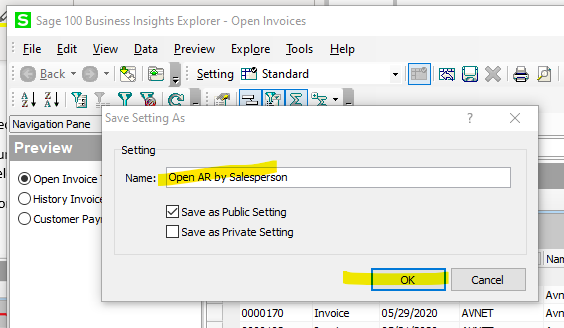
Click on the File menu at the top left corner and select “Save Setting” and enter a name for your view when prompted. Click the checkbox to “Save as Private Setting” if you wish to be the only one able to use this custom view, or leave “Save as Public Setting” if you’d like others to be able to access and modify your view.
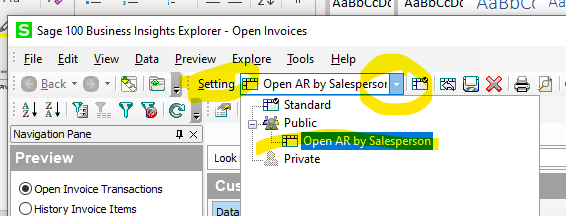
To access your view in the future, click on the drop-down menu next to “Setting” and select your saved view.
You can create as many custom views as you like for different purposes and find them stored here under this menu.
That’s all for now! If you found this helpful, stay tuned to future installments to learn more about views including how to export them to Excel, format columns, and add calculations and charts.


