Employer Solutions / HRMS Newsletter – May 2018
Keeping You Up-To-Date With Information About Employer Solutions / HRMS
Tips and Tricks for Sage HRMS
 Whether a long-term user of Sage HRMS or just beginning, it is always useful to know some “tips and tricks” from the pros. Below are some tips from our consultants you might find useful.
Importing Payroll Information (Payroll)
Many times, it is useful to import data into Sage HRMS Payroll. This can easily be done for many screens, especially payroll rules. If you do not see a drop-down menu, Right-click on a blank area near the first line of text on the rule to activate a hidden menu.
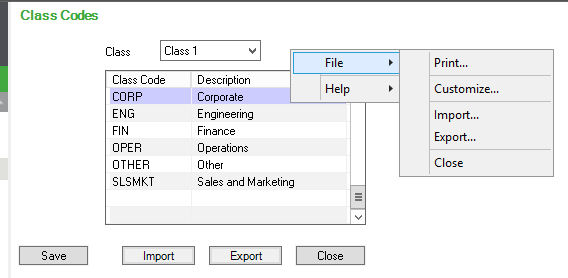
Click the Import button. Select the type of imported data from the drop-down list (if applicable).
Note: In the Import window, the information columns are disabled until you select a file or database to import.
Depending on the Type you select, the label of the field beneath the Type field will change as shown in the following table:
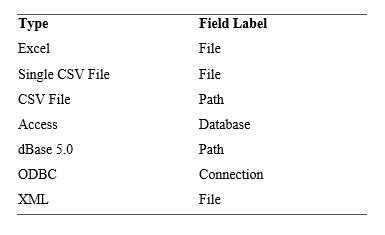
The import checks that the key values for details in CSV flat files match the header keys.
The Import dialog box has the following columns:
- Displays the record (or records) that are available for importing.
- Displays file names.
- Displays Not Ready until you choose the file you will import, then this changes to Import Ready.
- Displays field names.
- Displays field names from the title record. These are set to Default Value until you select the file to import and can be changed back to Default or Default Value.
- Data Type. Displays the type of data (for example, String, Integer, Boolean, Date/Time, or Float).
Select an option in the Action field drop-down list:
- To import new records, select Import.
- To overwrite existing records, select Update.
- To import new records and update existing records, select Insert and Update.
Click the Browse button to specify an Access database or Excel file; for a CSV import, specify a path or database. The Import dialog box reopens; the columns are no longer disabled, therefore they can be edited, for example, you can right-click on cells in the Contents column to change values.
Click OK to import the file. A message displays the number of updates and insertions, and the number of items processed.
The “About Sage HRMS” Screen (HR and Payroll)
On the “About Sage HRMS” screen you can store and see several useful pieces of information concerning your Sage HRMS installation. From the Home Screen click on the Help icon (the green circle with the question mark in the upper right corner of the screen). From the menu, select “About Sage HRMS”.
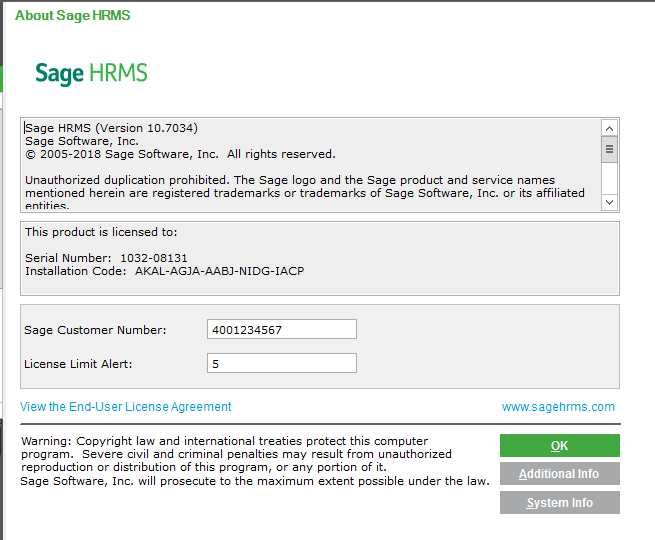
On this screen you can enter your Sage Customer Number, helpful to know when calling Sage technical support or working with Aatrix. You can also enter a License Limit Alert. This will alert you when you are within the limit of your Sage HRMS license. For example, if you have a 300-employee license, the above illustration would display an in-product alert when you reach 295 active employees.
The “Additional Info” button will display your currently licensed HRMS modules and employee count. Click on the “OK” button to close.
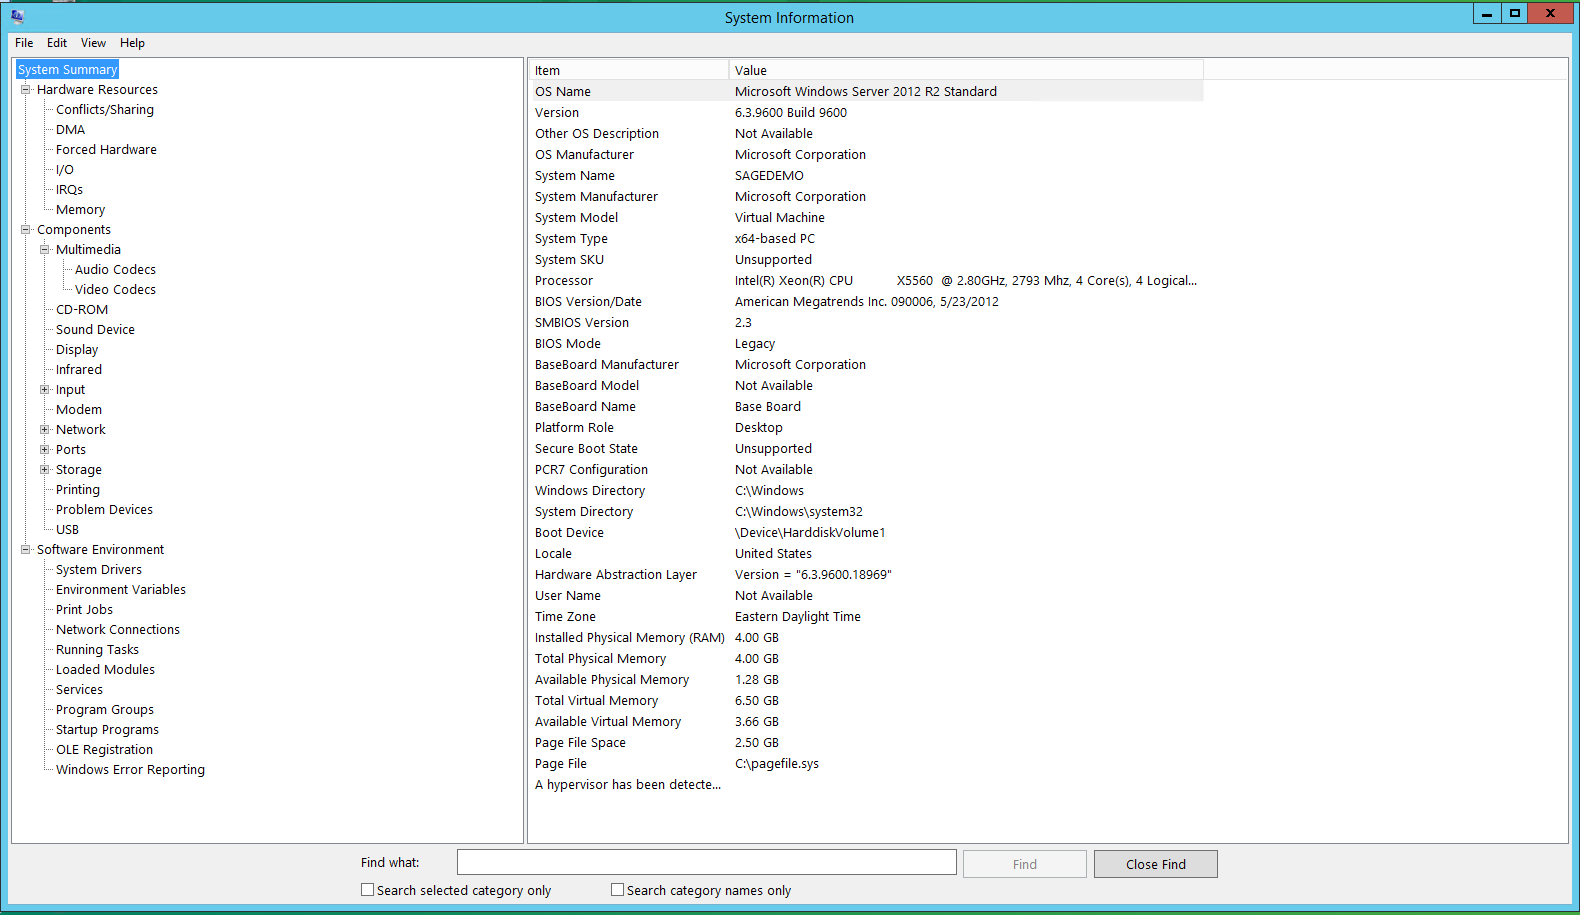
The ‘System Info” button opens a detailed analysis of your workstation configuration. Processor, hard drive size, and amount of memory are just some of the items displayed. This can be useful when troubleshooting any issues on your workstation. Click on the Red ‘X’ in the upper right to close.
Import Calculations (HR)
Import Calculation is a process in HRMS that compares values in an employee’s record with the rule tables you have created. Import Calculations then makes sure that the descriptions in the rules match the values in the record. This is particularly useful when importing data from an external data source. Import Calculations is run from the Employee \ Processes menu. (If you don’t see the process on your menu check with your HRMS Administrator to be sure that it has been made available to you in Group Security.)
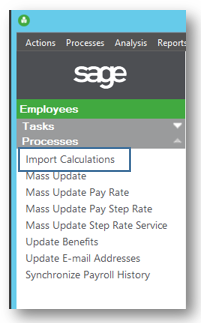 Items checked when the process is run include:
- Annual salary
- Compa-ratio
- Last pay change information (such as date, amount, and percent)
- Total dependents and total insured dependents
- Supervisor Name
- Secondary Supervisor Name
- Validating
- Job codes
- Job title
- Job group
- Salary grade
- EEO class
- Exempt status
Import Calculations is a great ‘housekeeping’ task to run from time to time. Also, users do not have to be logged out of HRMS when you run the process.
Customizing the Logon Screen (HR and Payroll)
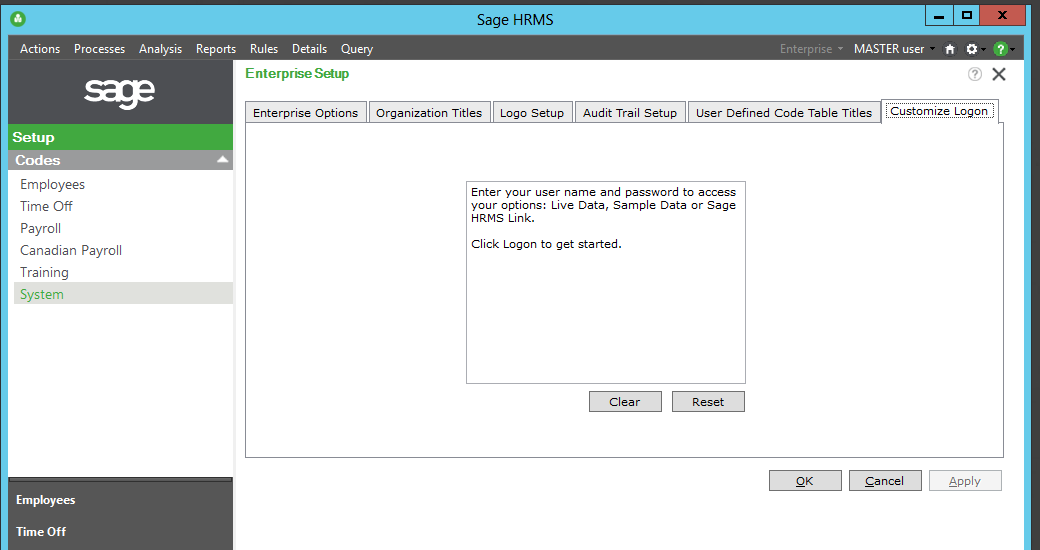
Did you know that you could customize the message HRMS users see at the logon page? You can give specific instructions for logging in, give examples or include a message (for example, letting users know they need to be out of the system at a certain time so an update can be applied or reminding them to log out at the end of the day.) Navigate to Setup\System\enterprise Setup and locate the “Customize Logon” screen. Messages are entered in as plain text (no logos or links). Don’t forget this is a message to all users of HRMS, not just to an individual user.
Setting User Preferences (HR and Payroll)
 Tired of always seeing terminated employees when you do advanced searches? Want to jump to a specific page when you open an employee’s record? You can set your own individual settings for those items and more using User Preferences. From the Welcome Screen, navigate on the dropdown menu to the Settings “gear” icon and select User Preferences.
You will be presented with a screen where you can set default values as well as opt out of Product Enhancement and Product Survey from Sage.


