 How to Install and Manage Sage X3 Add-Ins in
Microsoft Office

When you enable an add-in, it adds custom commands and new features to Microsoft Office programs that help increase your productivity. In this blog post, we’ll review how to install the Sage X3 Add-In for MS Excel and what to do if your Sage X3 Add-In is missing.
How to Install the Sage X3 Add-In in Microsoft Excel
Go to Administration > Utilities > Installation > Install addins for Office
V11 Image:

V12 Image:
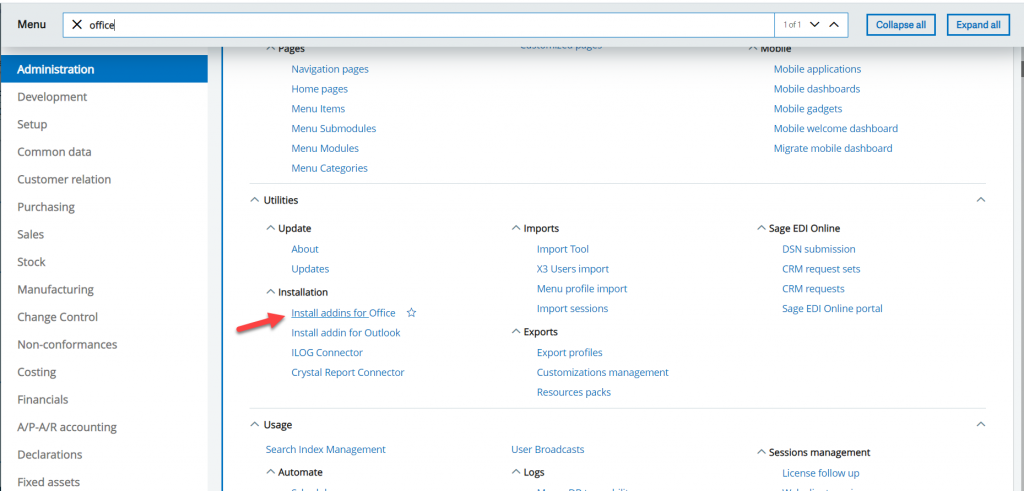
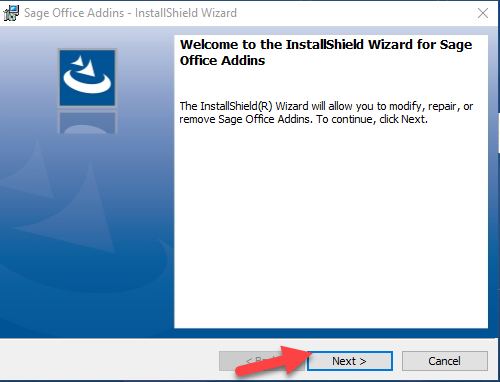
It should begin downloading the exe, open the exe Next > Install
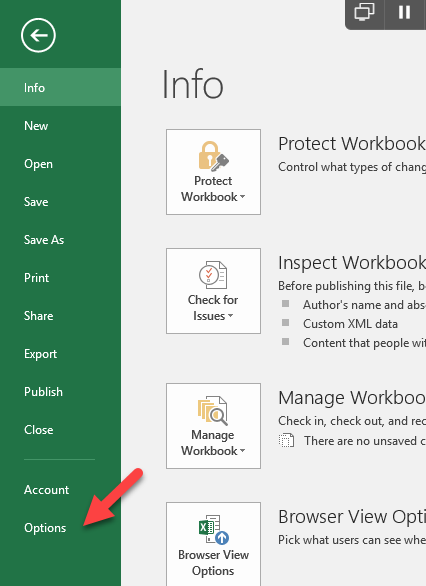
Open Excel > File > Options
Select Add–Ins > Manage: COM Add-ins > Go
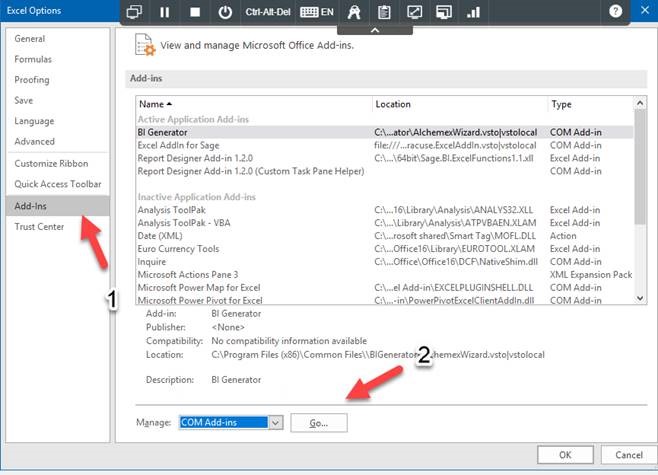
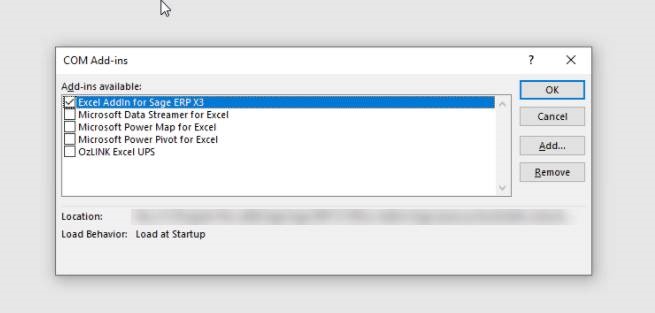
Check the “Excel AddIn for Sage” > Ok
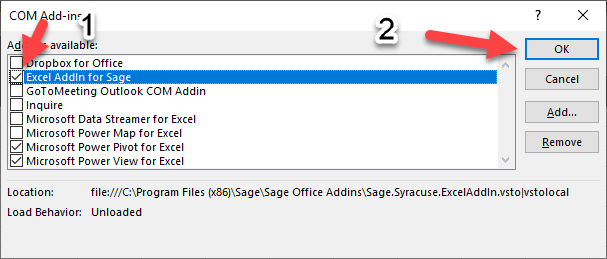
You are now ready to export Excel-based reports/grids from Sage X3.
How to troubleshoot and fix a missing Sage X3 add-in in Microsoft Excel
Open the Microsoft Office product where the Sage X3 add-in is missing.
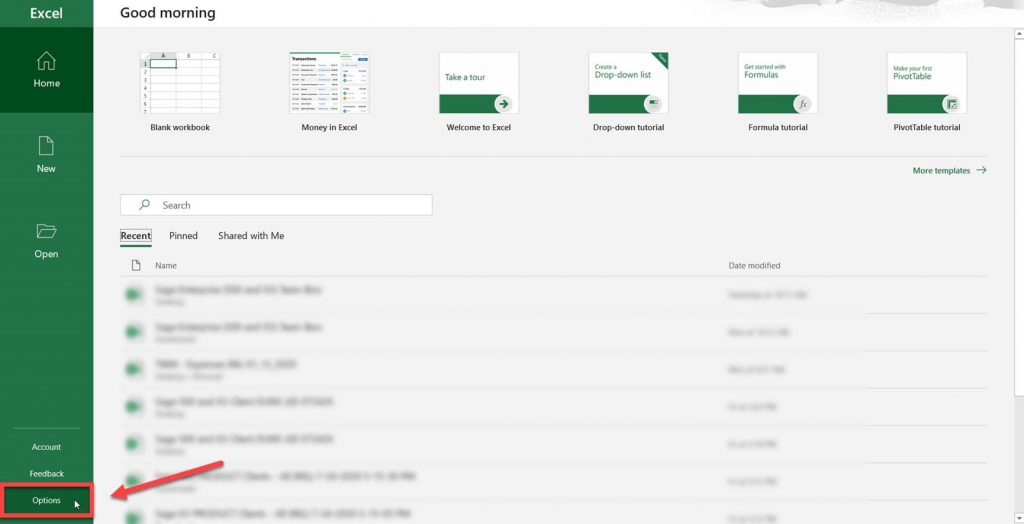
Go to Options:
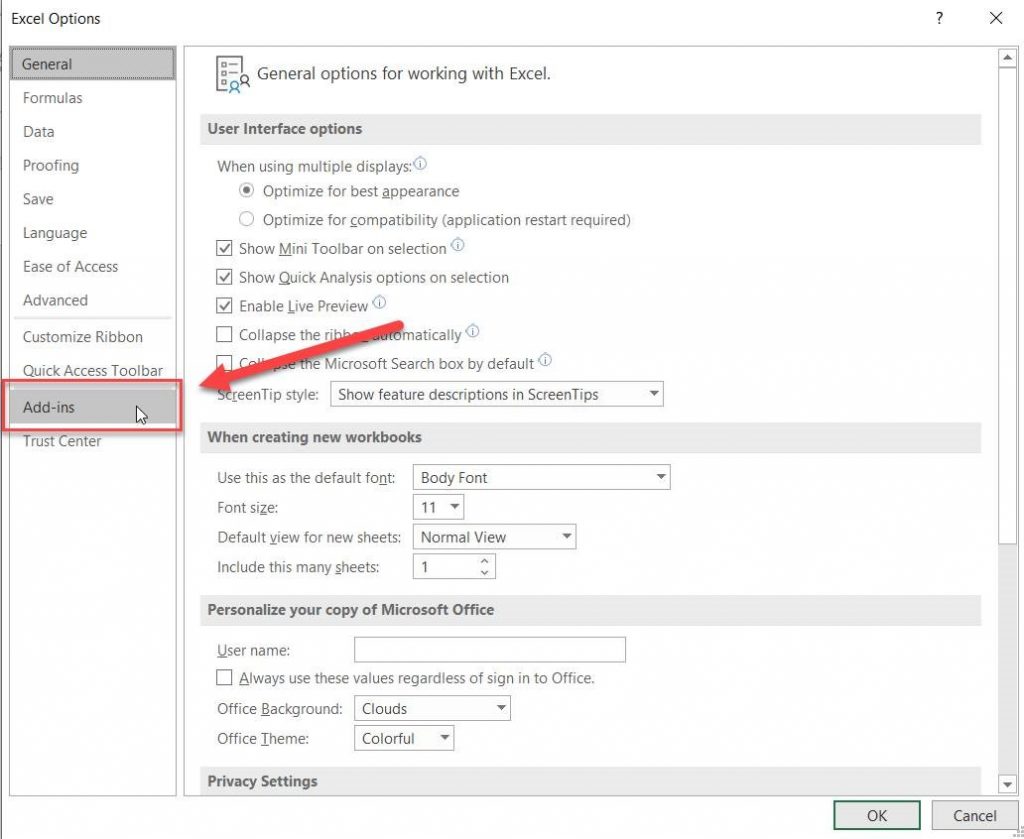
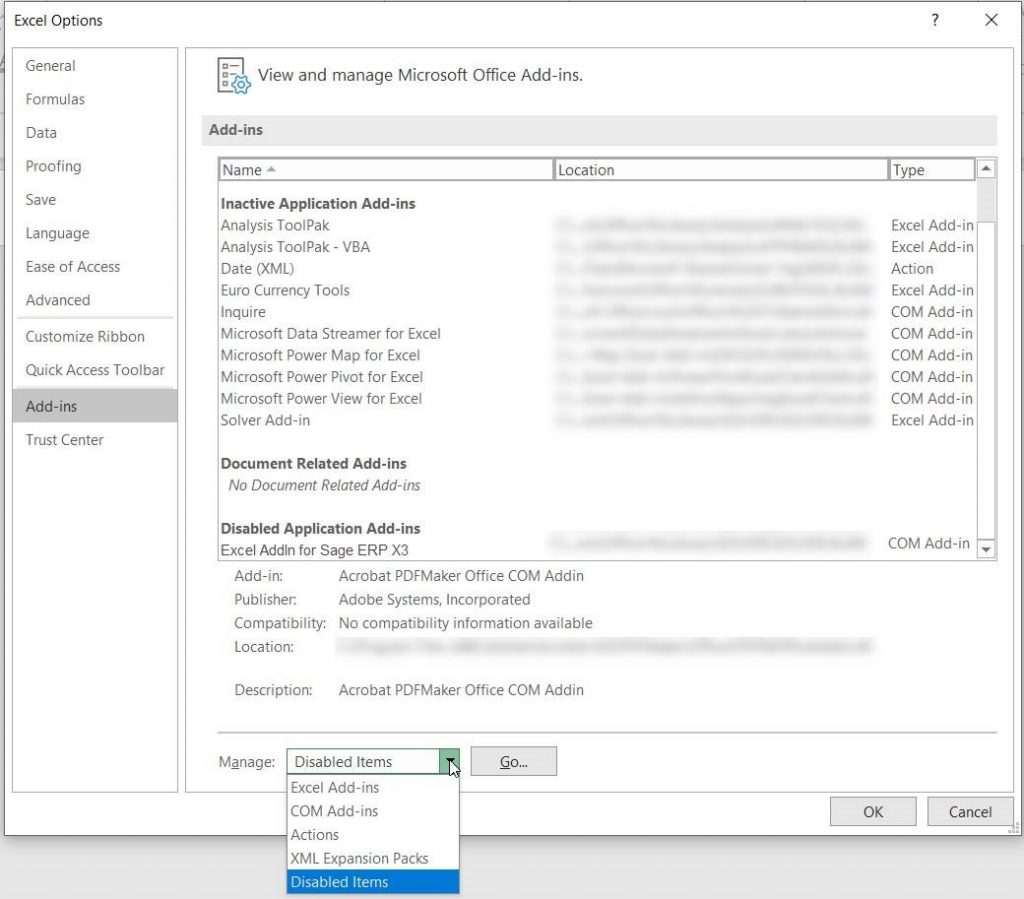
Select Add-ins:
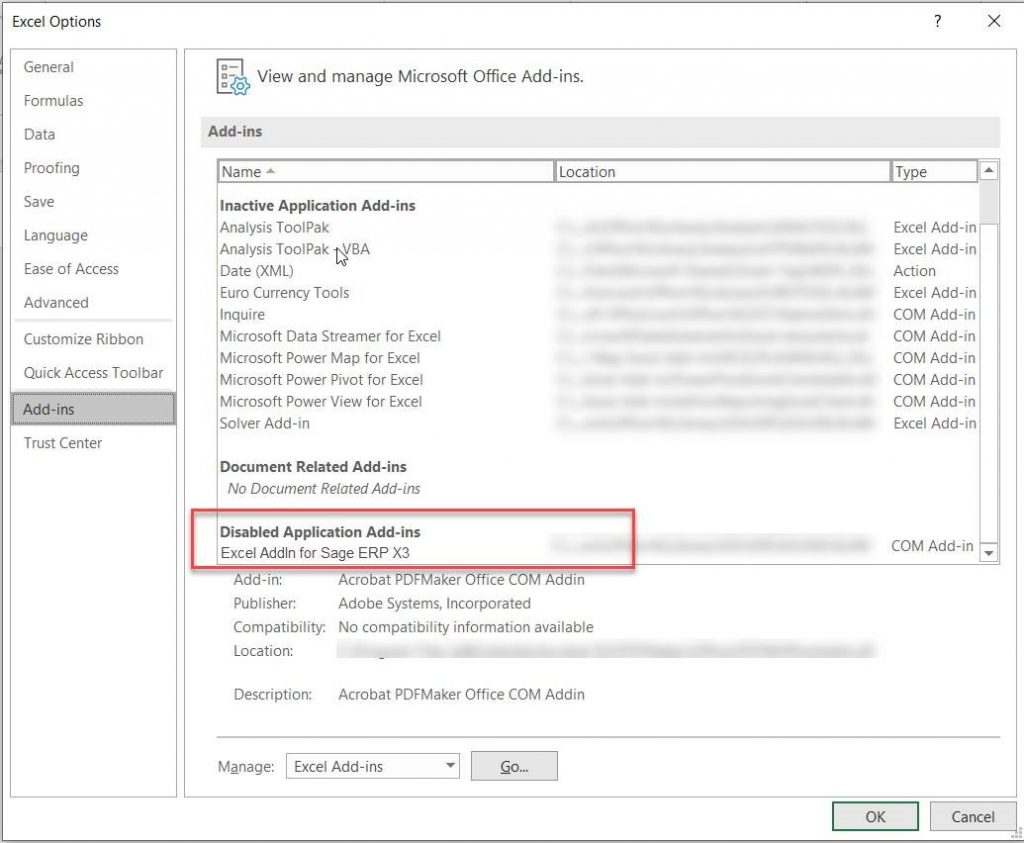
If Sage X3 appears on the list of Disabled Application Add-ins, select Manage: Disabled Items and press GO:
Choose SyracuseExcelAddIn from the Disabled Items list and press Enable:
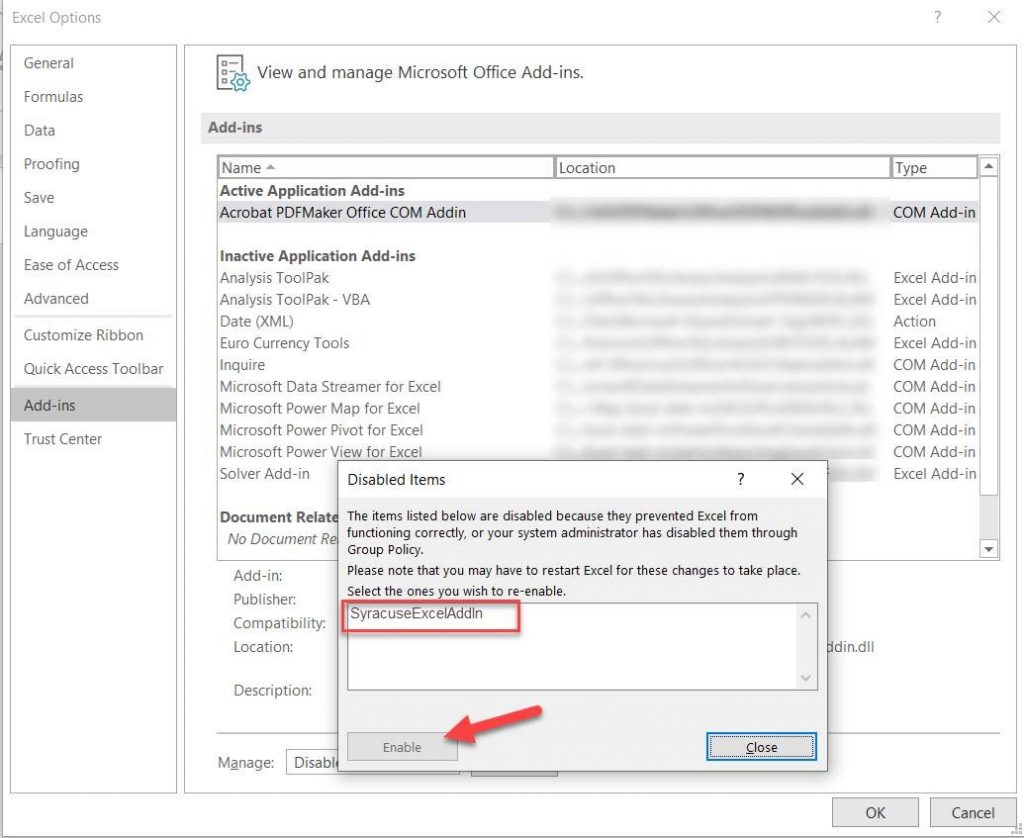
Then choose Manage: COM Add-ins and press GO:

From the list of available COM Add-ins, check Excel Addin for Sage ERP X3 and press OK:
Press OK on Excel options.
You will now see the Sage Add-in on the ribbon. If you do not you may need to close and re-open application.
If you have any issues following these steps or need additional help enabling missing Office add-ins, please contact us.


