How To Guide: Left List Personalization in Sage X3
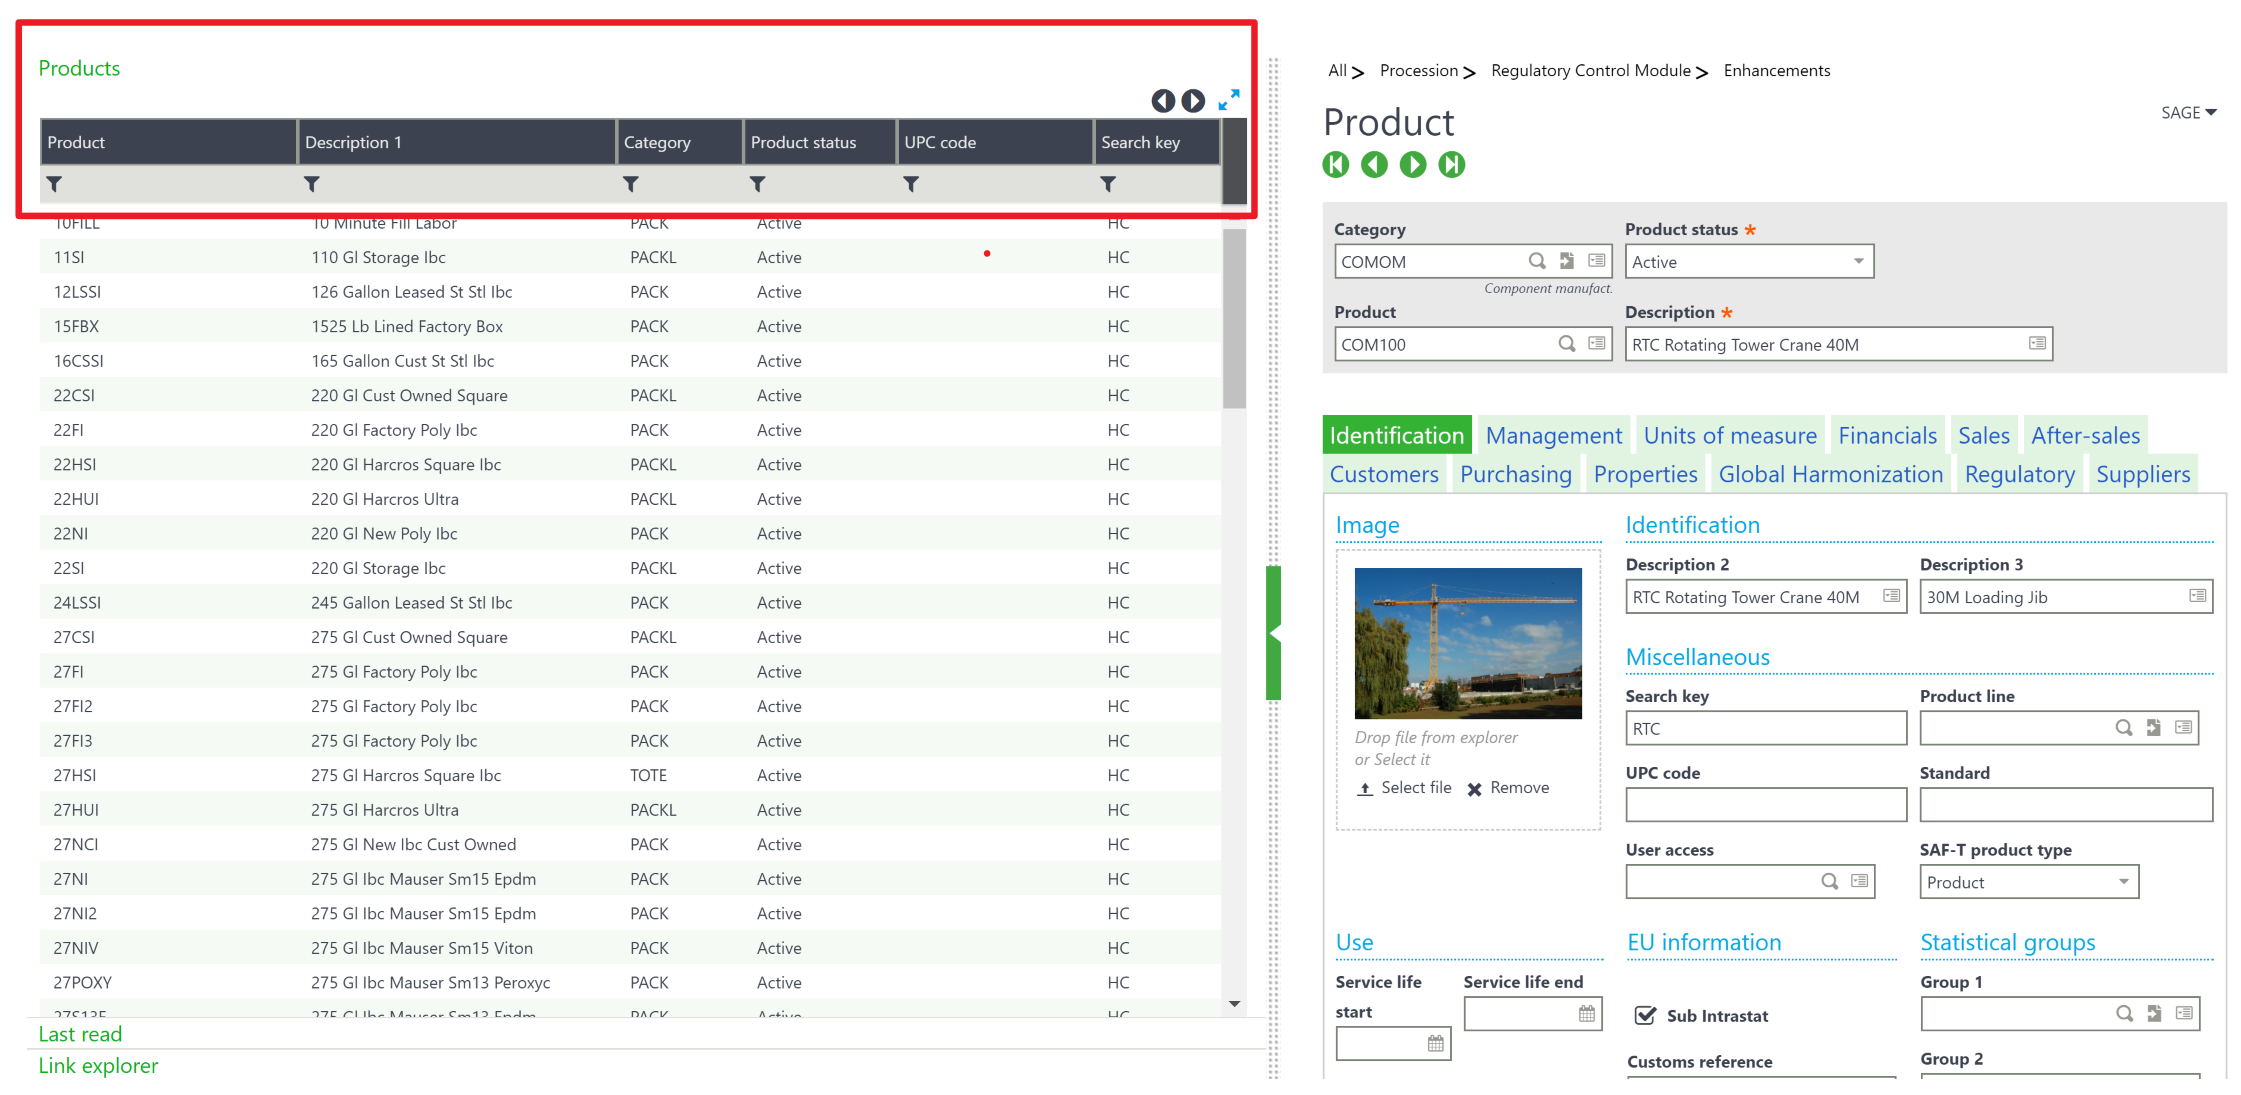
This Sage X3 “how to” guide will explain the simple process for customizing the left list of a function in Sage X3 (Enterprise Management). The information found in the left list is controlled by the object of a function. To make adjustments to the content in the left list in Sage X3 use the Objects (GESAOC) function by following the path Setup > General parameters > Personalization > Objects. This function can be used to add fields to the left list from the primary table associated with functions header table. This guide will focus on the changing the quick select left list of a function. In the screenshots below we show the example of the Create Date field being added to the Product left list.
Object Personalization Function
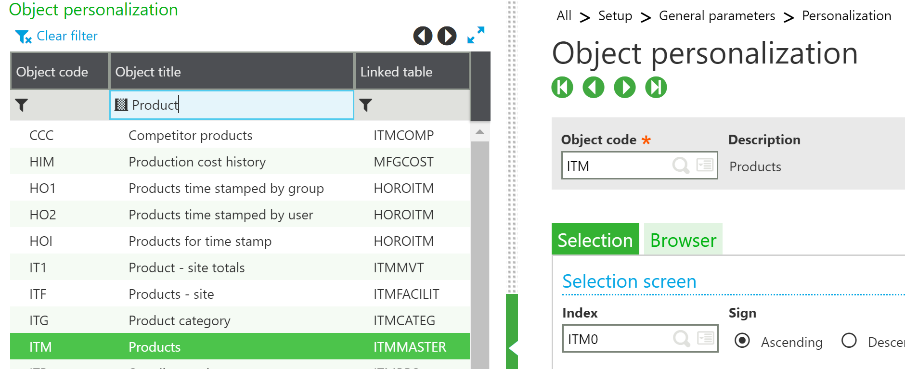
- To begin personalizing the left list follow the path Setup > General Parameters > Personalization > Objects.
- At the Object code field, enter the three-character object code. If you do not have the object code it is also possible to use the left list to filter and search for the code. This will load the record for the specific object.
Note: Changes to the object and the left list can also be done by following the path Development >Script Dictionary > Objects. In both functions the process for making modification to the left list are nearly identical, however the Objects function in the Development module enables a user to make far more complicated additions to left list.
Selection Tab
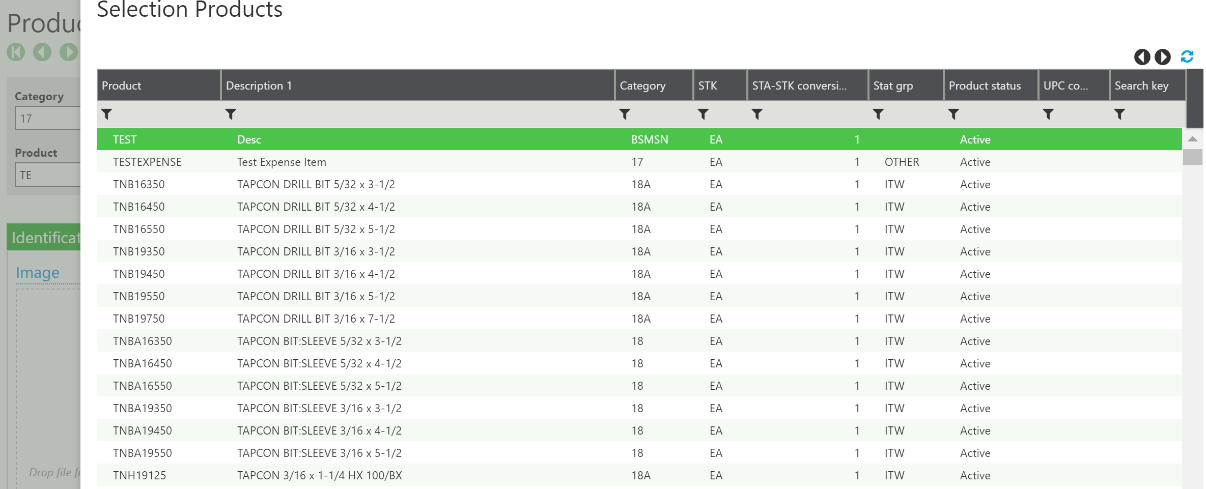
All the information that is used to construct the principal left list for the object as well as the selection window (magnifying glass in a field) is found here on the selection tab. In addition, there is the possibility to define the selection options. The list of columns that will appear in the left list is entered in the grid on this tab. These columns can be fields from the principal table, a secondary table, or one of the tables defined as linked to the principle table in the object definition function. The header table of a function is typically the principle table, meaning for the example below any fields found in the IMMASTER (sales order header table) can easily be add to this grid.
Selection Screen
- The Index (field SELCLE) field is used to define an index for the principal file for the display in the left list and in the selection windows. If this field is empty, it is the first index in the table that is used.
- The Sign (field SELORD) field is used to define the direction from moving through the principal table for the display in the left list and the selection windows for the object.
- If the hierarchical list (field SELTREE) key is selected, the left list will appear to be composed of several nested parts, the list presents only the first part of the key initially.
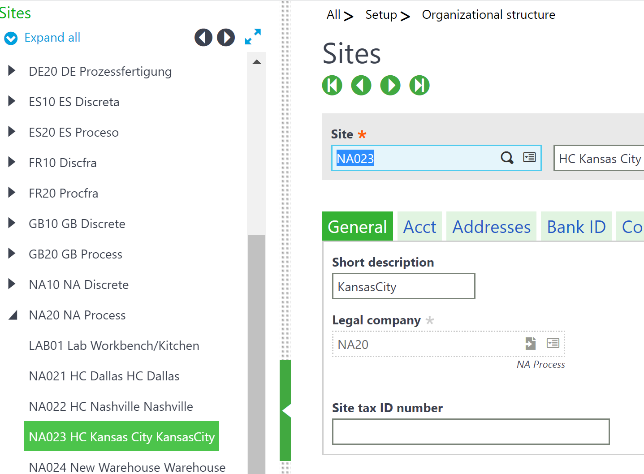
- An example of a hierarchical left list is in the site management object: each site being attached to a company; the initial display is the list of companies and there is then the possibility to expand a company by double clicking it the list of sites then appears and it is possible to select one of these. If the box on the object is not checked, it would be a simple left list.
- Entering a value in the no. characters (field SELCAR) field defines the number of characters used to specify where the selection should start, as a function of what and how many values has been entered in the field before the selection. If this value is N, the selections starts from the first key where the first N characters are greater than or equal to the string entered.
For example:
- If the value 2 is entered and if the string DEF is entered before opening the selection, the selection window will start the search from the first value of the key greater than or equal to DE (if keys starting with DEA exist, it is these that appear first in the window). If H has been entered, the selection will start with the first key greater than or equal to H.
- If this field has the value 0 the selection window will always start at A and is not limited.
Selection Fields
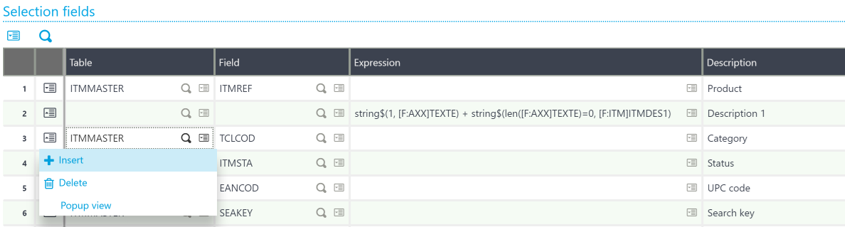
The following step explain how to make changes to the values contained in the left list.
- In the Selection Fields grid, insert a new line by selecting the action card at the beginning of the line and select insert.
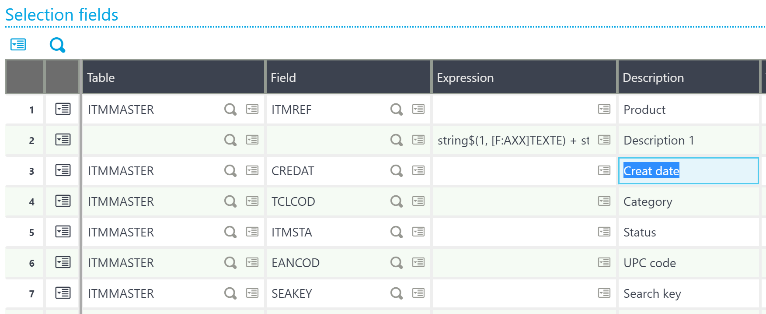
- Enter the table in which the field to be displayed is located or leave this blank and tab to the expression column to enter a calculated expression. For the changes to be effective the table must be the primary table or linked to the object’s primary table.
- Enter the field from this table that should be displayed in the left list or enter an expression.
- The description will automatically populate based on the description found in the table, however it can be freely modified to customize the column description displayed in the left list.
- If a field value is entered the data type will come from the data type defined for this field on the table, if an expression is entered the data type is a mandatory field and will have to be entered.
- The Options field is active for lines containing an expression, there are different formatting styles, fonts and themes that can be added by selecting from a predefined list. The available options vary depending on the data type entered for this field.
- Finally, there is the possibility to indicate a length for an alphanumeric column constructed by an expression. If not entered, a length of 30 characters is used by default.
- Save any changes made to the selection fields table.