 How to Disable the Export to Excel/XML Button or Restrict the Fields Exported to Excel/XML

This blog discusses options for disabling the Export button on the right-hand side of the screen or restricting which fields are Exported for security purposes.

Option 1: Disabling Export button in a Menu Item
You may be asked if it’s possible to disable the Export button for security purposes. Unfortunately, this feature is part of the default options, and there is no way to disable it without writing Custom Code to do this. There is a Help Page on this topic:
How to deactivate “Excel Export” options within code | (sageerpx3.com)
The code in the above topic disables the Export button for all Users – you may decide to add code so it is more selective.
Option 2: Restricting the Fields exported
As an alternative, stopping particular fields from being exported to Excel/CSV or XML from a Menu Item may be sufficient – perhaps certain information is sensitive and shouldn’t be distributed via Excel/CSV or XML files.
When considering the Export functionality, you need to realize that it is based on extracting the information stored in the fields defined in the relevant X3 Screens. To do this, we use a piece of built-in functionality related to Access Codes:
- Set up an Access Code, for example “ZDWNLD”
- You may have to untick the “All access codes” and add the new Access Code to the Classic User in Parameters > User > Users (GESAUS)
- Set “Inquiry” and “Modification” to “Yes” – this will mean data is displayed in Fields with ZDWNLD Access Code and allow them to modify those fields (that’s another story).
- Set “Execution” to “No”
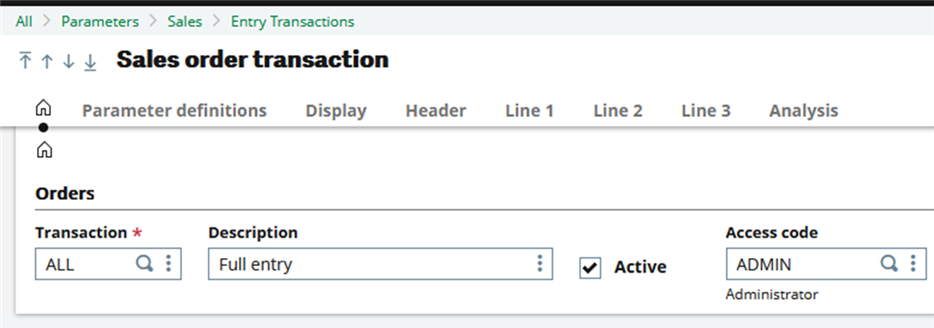
If the User was set up with “All access codes” before, the User may not have access to all the features they had previously when “All access codes” is un-ticked – for example, they would be able to go into Orders (GESSOH), but the “ALL” Entry Transaction is not available – this is because menu items may have their own Access Code, “ADMIN”. Unfortunately, this means that some analysis may need to be carried out so that appropriate Access Codes are added (with “Inquiry”, “Modification” and “Execution” all set to “Yes”) – perhaps even add all the Standard Access Codes as a last resort?

- Add “ADMIN” to the list of Access Codes
Note that Queries displayed on the standard Queries on Landing Pages may also have Access Codes, so their Access Codes may need to be added for the User(s).


- Add “RESSMAGA” to the list of Access Codes:

Note that this procedure doesn’t work if “ADMIN” User Function Profile is assigned to the User.
Here are a couple of examples to illustrate the process – one is for a particular Entry Transaction type, and the other is for Customer Entry
Example 1: Sales Order “ALL” Transaction Type
In this example, the X3 CFO has asked that certain Users should not be able to download specific field-values to Excel/CSV or XML files – in this case, the “Carrier” details which are displayed as part of the “Delivery” Tab/Screen on “ALL” Transaction Type:

The screen behavior is controlled by Parameters > Sales > Entry Transactions > Orders (GESSLC)

Rather than hiding the field on the screen, the CFO would like it to still be displayed, and make the restriction User-specific instead, at the Export level.
With that in mind, the alternative is to change the actual Screens related to the “ALL” Transaction Type.
Check for Windows with the appropriate abbreviation, SOH in this case, to find the relevant Window and Screens:

And then drill-down into the appropriate Screen

In this case, WK2ALL12.
Assign the ZDWNLD Access Code to the BPTNUM field:

Once you’ve amended the Screen, Save and Validate, and that should be it – anyone with ZDWNLD Access Code will see these fields but they won’t be exported to Excel/CSV or XML.
Example 2: Customer Entry
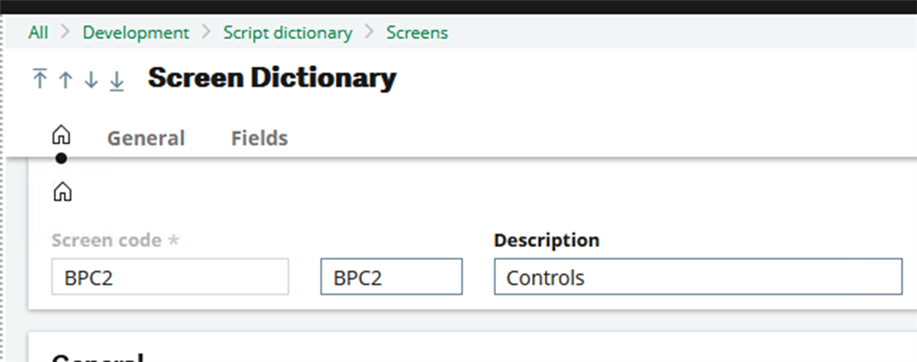
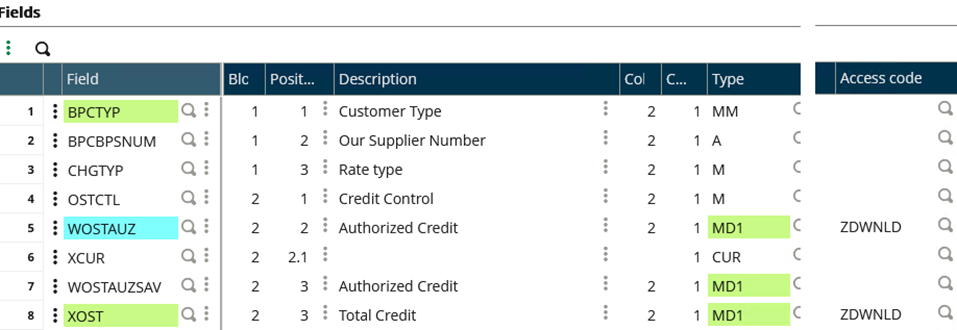
The Customer’s CFO would like to stop some Users from sending out an Excel/CSV file with the Authorized Credit and Total Credit data for a customer.

Again, assuming the initial Access Code and User setup are as before, assign the ZDWNLD Access Code to the appropriate fields:


Once you’ve amended the Screen, Save and Validate, and that should be it – anyone with ZDWNLD Access Code will see these fields but they won’t be exported to Excel/CSV or XML.
Please remember to set up an Activity Code to make sure these Customization aren’t lost when upgrading!
Conclusion
There you have it, two ways of restricting the Export feature – the second one is more targeted in that it can be aimed at a User and Field level but can have a high overhead in setting it up.
I hope you find this article to be of use.


