 How to Configure Color Coding of the Calendar Gadget in Sage X3

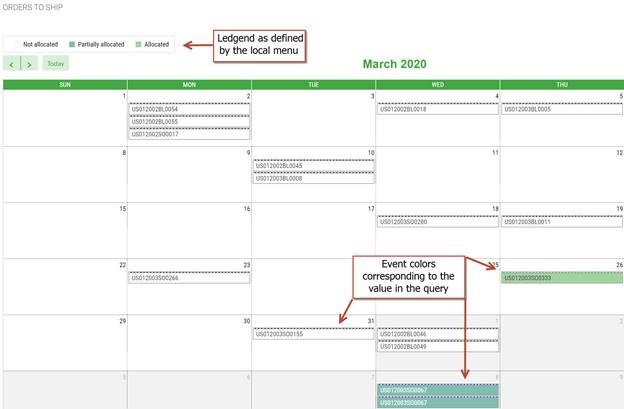
Sage X3 has several widgets that can be customized and added to landing pages to create a unique user experience. One in particular is the Calendar Gadget. In a previous blog post, we told you how to add the Calendar Gadget to a homepage. The Calendar Gadget is based on a query and with a little set up can be color coded to signal different event stages. This blog post details the process to configure the color coding of the Calendar Gadget.
ADDING CRITERIA TO MY QUERY
- Follow Setup > Usage > Reports > Graphical Query
- Locate Query STO005.
- This is the query that the calendar is based upon.
- The Allocation Status field can be added to the query to indicate if an order is allocated, partially allocated, or not allocated.
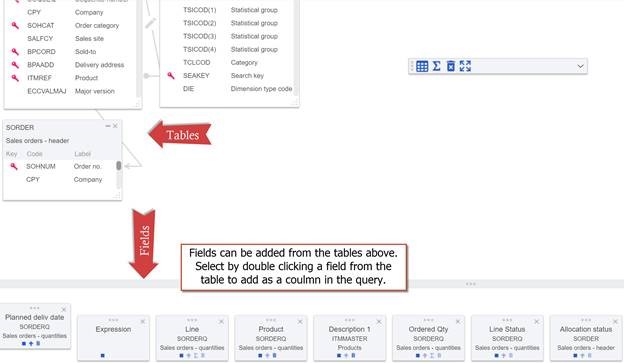
- Select run from the right-side menu to see the full query.

ADDING COLOR TO A CALENDAR
-
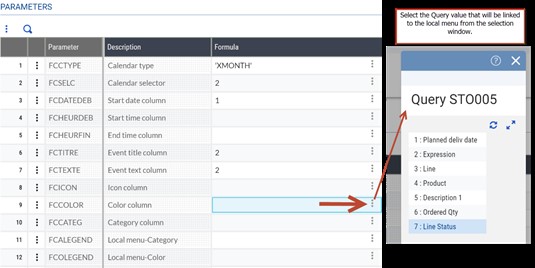
- Follow Setup > Interactive Components > Dashboard View
- Search for Code RSTO0051
- Locate Rows 9 and 10
- Color column is for the event color and category column is for the legend descriptions, these will generally be the same.
- This will link the values in the query to a color defined by the local menu parameters (below).
- Select the ellipsis and select a value from the query.
-
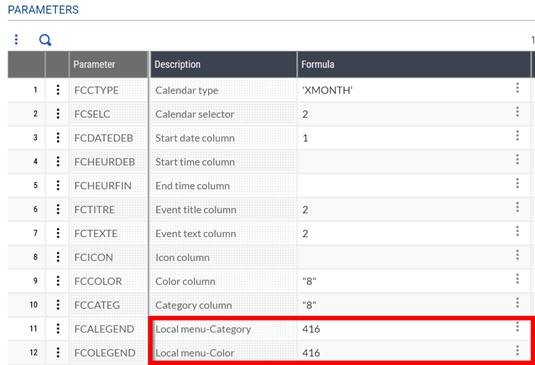
- Locate Rows 11 and 12
- This will define the legend and the event colors.
- Local Menu-Category is for the calendar descriptions and Local Menu-Color defines the colors associated with these descriptions, these too will often be the same.
- Enter Local Menu – 416
- This local menu is associated with the allocation status.
- Locate Rows 11 and 12
CREATE A MENU ITEM
-
-
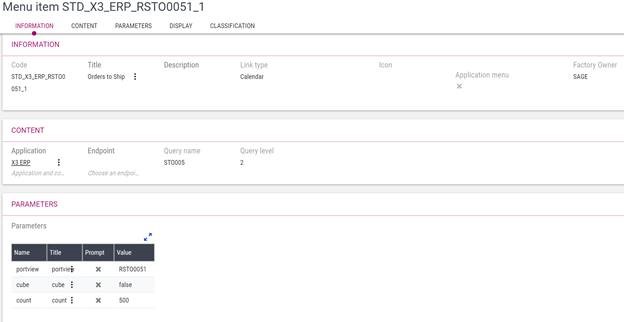
- Follow Administration > Authoring > Menu Items
- Select create new menu item.
-
For more detailed information regarding calendar colors, visit the Sage X3 Online Help Center.


