 Discover: Sage X3 Dashboard Calendar Gadgets
We have a technical blog this week going through the configuration steps of adding a calendar to your Dashboard in Sage X3. In this example, we are creating a new calendar gadget that will display Work orders in progress. We will use an existing query and dashboard view from the SEED folder for this example. The following general rules apply to other kinds of calendars.
IMPORTANT:
- Make sure that you do this work first in a test folder or environment to validate the results before you do the work in your production folder or environment. And make sure it is an experienced Sage X3 administrator on your team that does this work, so it’s tagged appropriately.
- Always use activity codes when creating or modifying X3 objects. This will protect your configurations from patches that are released for Sage X3.
We will be using an existing query to display the data in the calendar.
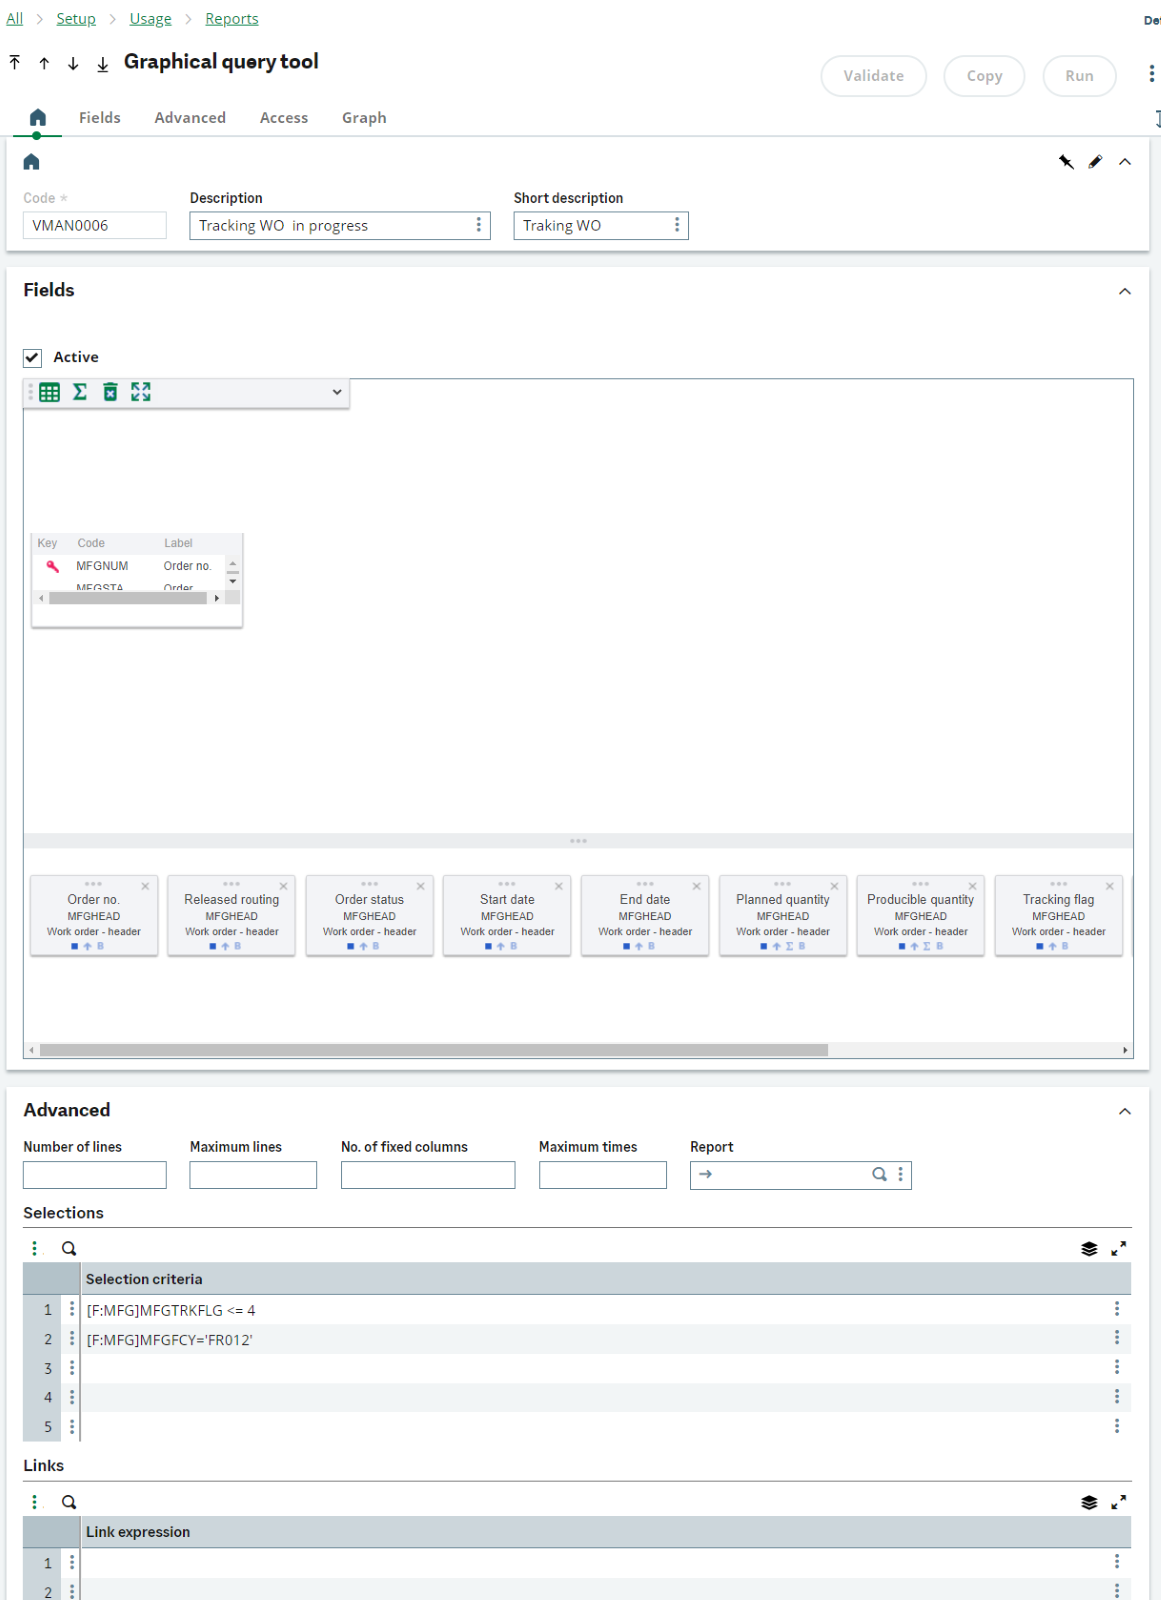
- Navigate to: Setup->Usage->Reports->Graphical query tool
- Choose: VMAN0006 (Tracking WO in progress)
- Note the definition and criteria below.
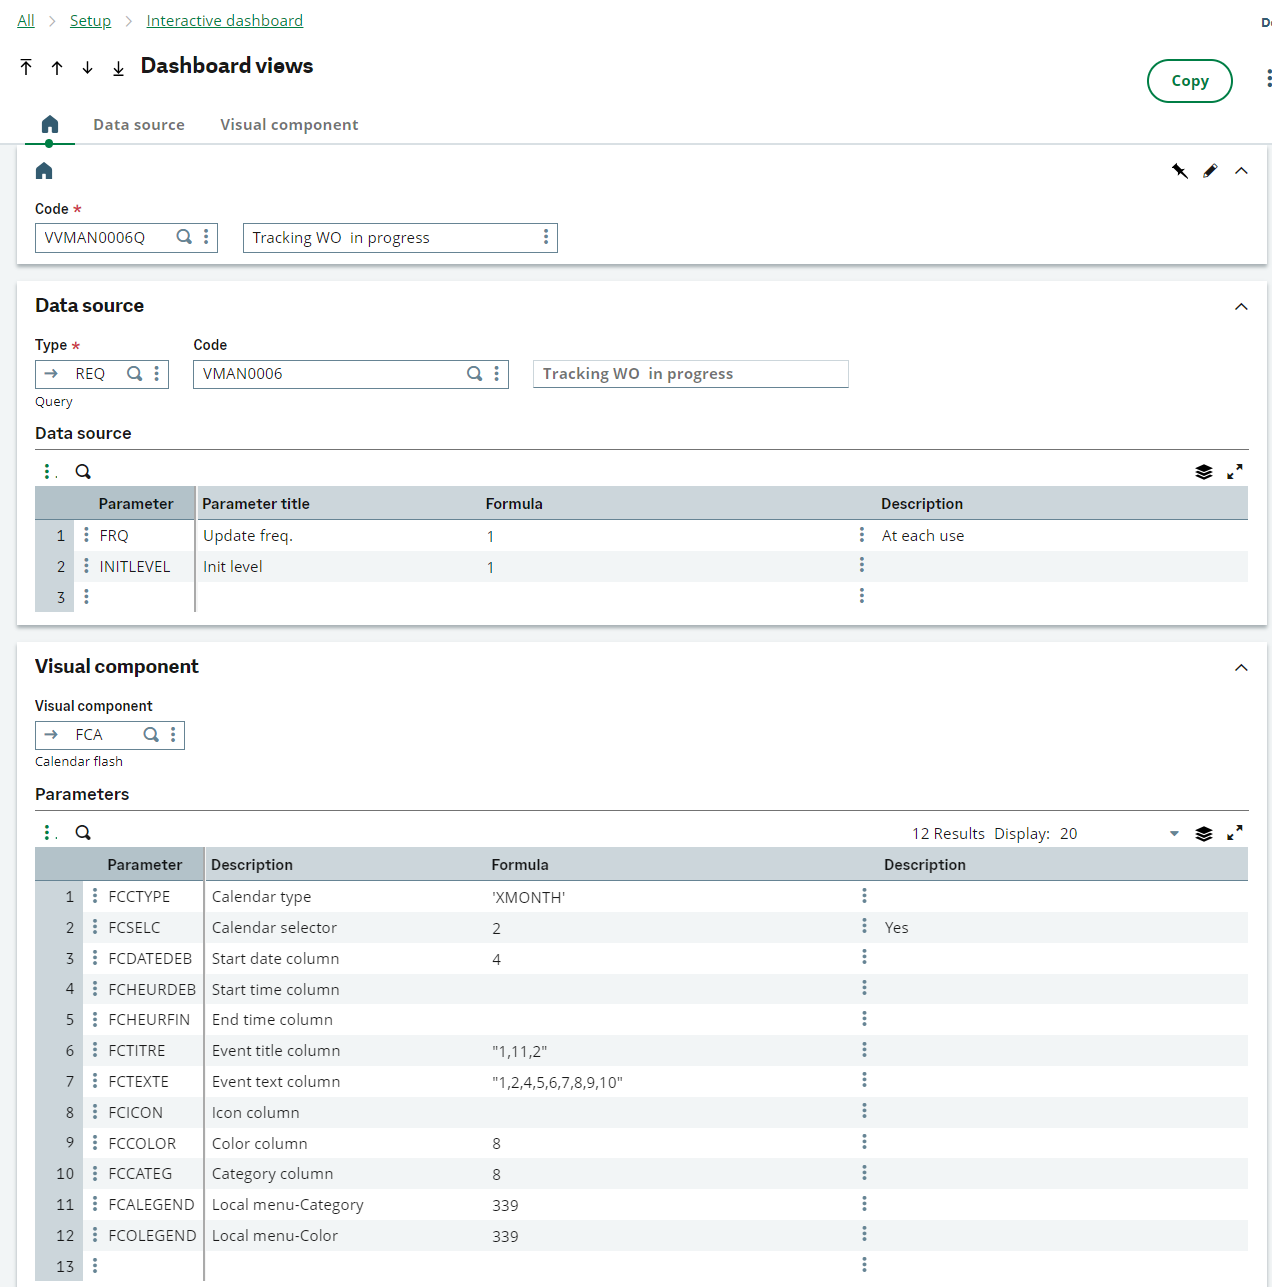
We will be using an existing Dashboard view:
- Navigate to: Setup->Interactive dashboard->Dashboard views
- Select: VVMAN0006Q (Tracking WO in progress)
- Note the data source, Event title column, and Event text column in the definition
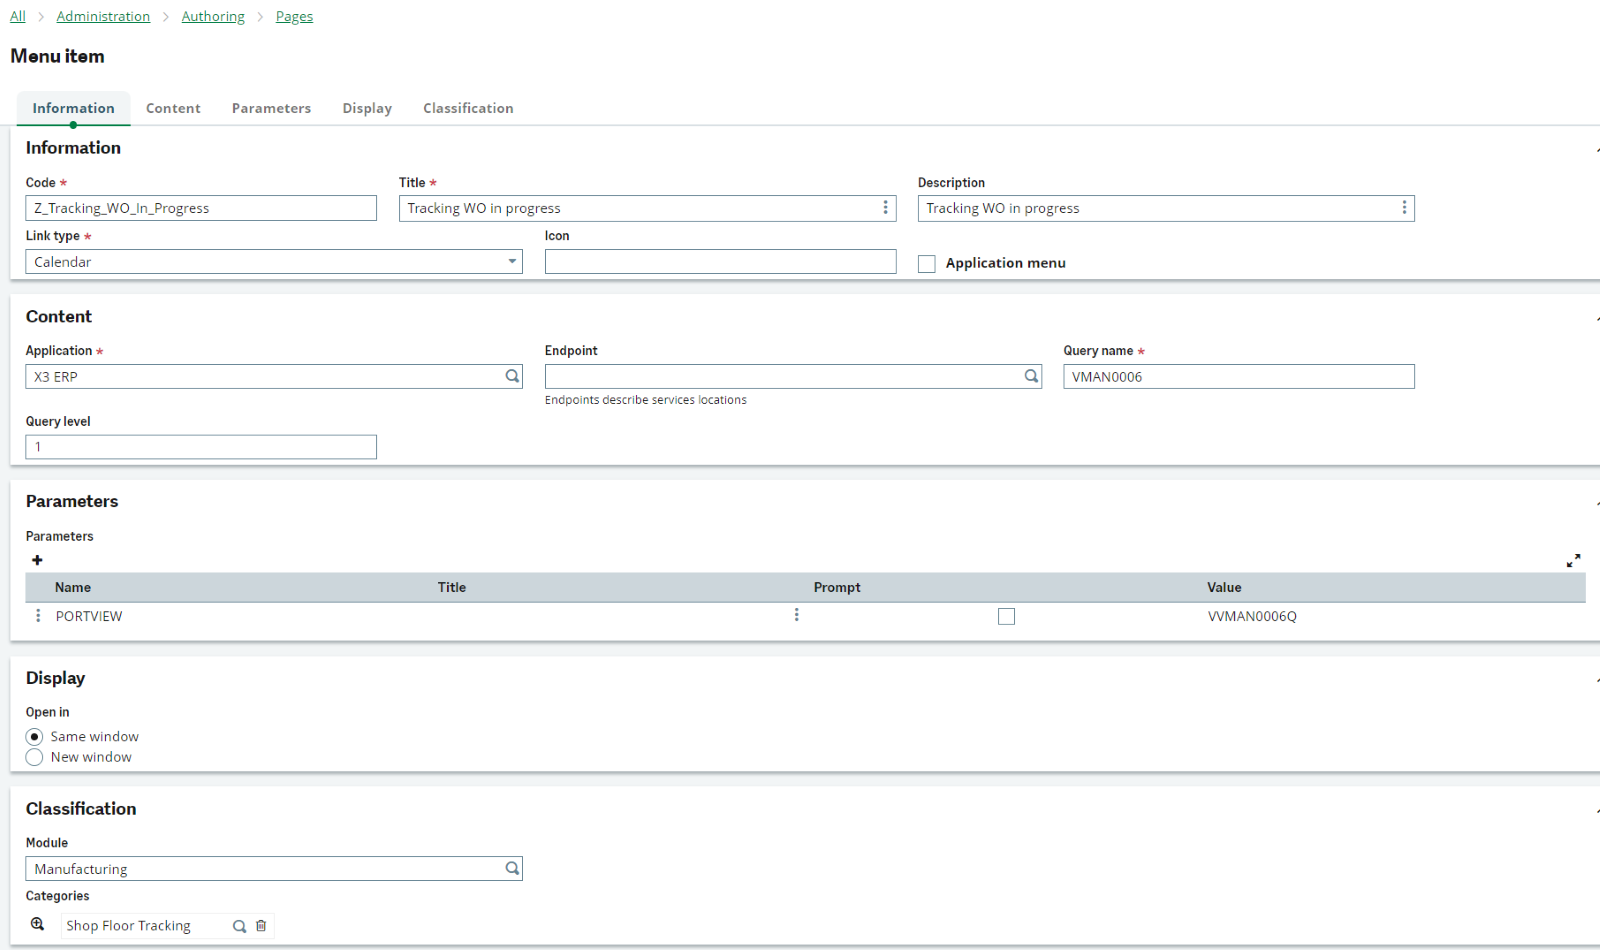
We will now create the menu item
- Navigate to: Administration->Authoring->Pages->Menu items
- In the upper right corner, click on the Actions button and select “New menu item”

- On the next screen, enter the appropriate Code, Title, and Description fields
- Choose “Calendar” for the Link type
- Choose “X3 ERP” for the Application
- Enter “VMAN0006” for the Query name
- In the Parameters grid, add a parameter row:
- Enter “PORTVIEW” as the name
- Enter “VVMAN0006Q” as the value
- Under Display, leave “Open in Same window” option
- Under Classification->Categories:
- For Module, choose: “Manufacturing”
- For Categories, choose: “Shop Floor Tracking”
Next, we will need to create the calendar gadget.
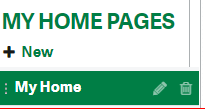
- Navigate to one of your home pages under the “MY HOME PAGES” section:
- Click on the “+” button in the top-right corner of the screen to add a gadget:

- On the next screen, click on the Calendar icon:
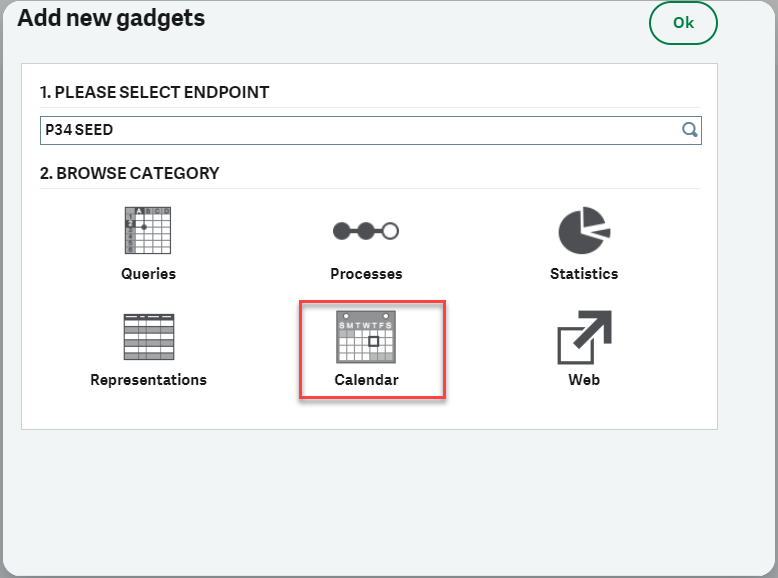
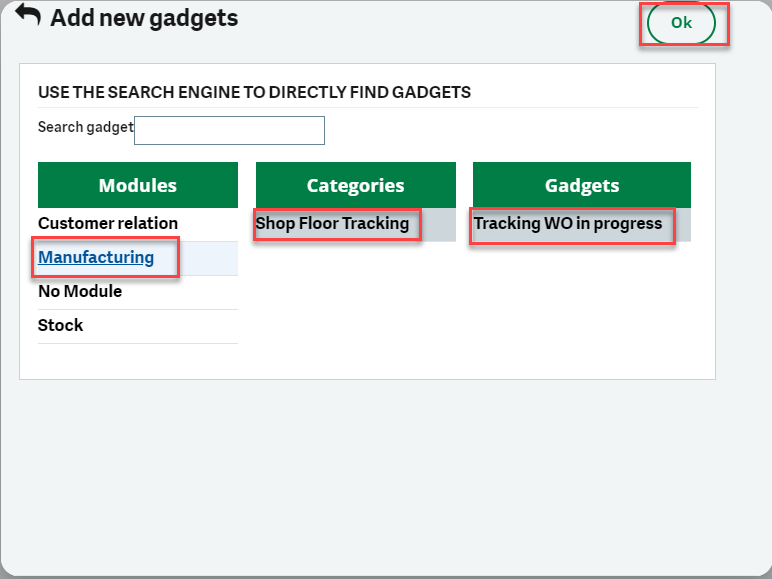
- On the next screen, click on “Manufacturing” under Modules, then click on “Shop Floor Tracking” under Categories, then click on “Tracking WO in progress” under Gadgets. Then click on the “Ok” button:
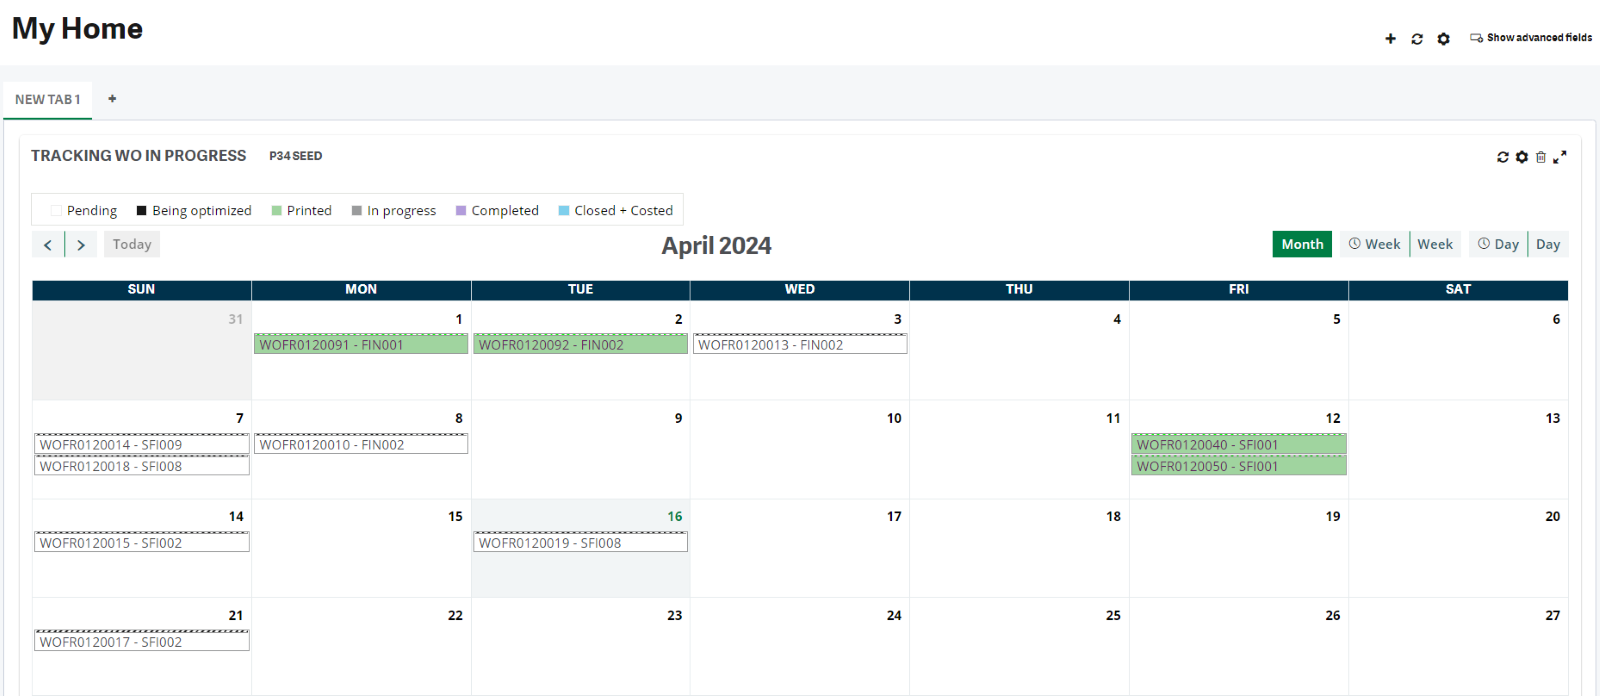
- You should now see your calendar displayed on your home page.
- Clicking on one of the items in the calendar will display more information:
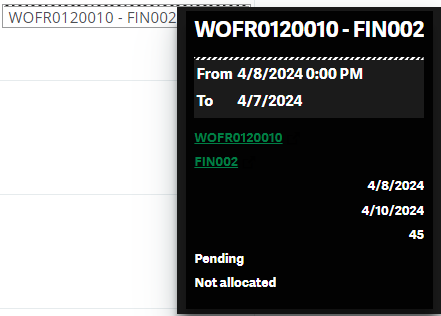
- Clicking on the hyperlinks will take you to the appropriate screen. In this example, it is set up to take you to the work order screen or the routings screen depending on which link you click on.