
Sage 100 Newsletter – Q2 2021
Keeping You Up-To-Date With Information About Sage 100
Add a Field to Sage 100 With a Lookup Table
By: Jane Amorim, Business Analyst / Consultant
We already saw how to add fields (UDFs) to Sage in a prior newsletter. Now, let’s learn how to add a field that allows us to select a value from our own custom lookup list. No coding is required for this one, but it does involve 3 parts.
Part I: Creating A Table (UDT)
We will first start by creating a list of territories to choose from.
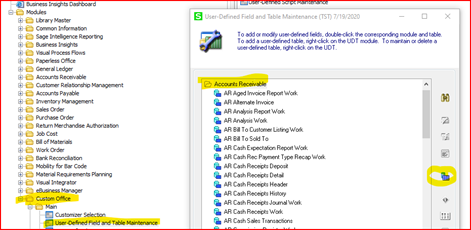
- Open Custom Office > Main > User Defined Field and Table Maintenance. Highlight Accounts Receivable and click on the “Add User Defined Table” button (highlighted below).
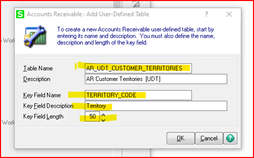
- Enter a table name, description, key field name (name of your new field), and make sure to give your key field length enough characters to accommodate all items on your list. Click OK when you’re done. Note: Although you can increase this field length in the future, it is cumbersome, so it’s best to get it right the first time. However, it is not possible to reduce the size.
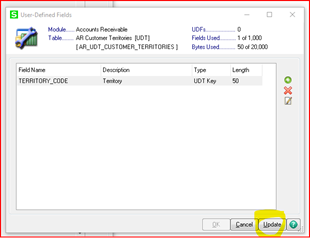
FYI: In the following screen you have the ability to add more fields (columns) to this table.
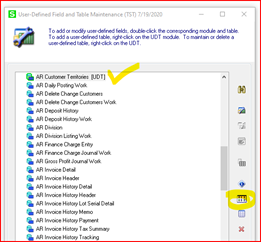
- Now that our table has been created, let’s add a link in Sage 100 to access it which will allow us to easily maintain the territories list. Click on the “Add UDT to Desktop” button and click OK when prompted.
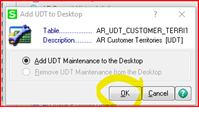
- You will need to give yourself (and other users, if you like) access to this new option in Sage. Do that via Library Master>Main>Role Maintenance.
- Select your Role, and expand the Custom Office > Miscellaneous Tasks menu.
- Check the box next to your new UDT and click Accept when done.

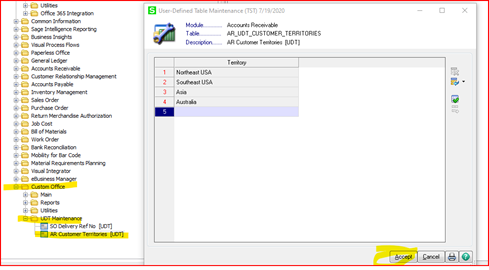
- Now open your table via Custom Office> UDT Maintenance.
- Enter the selection options you’d like to make available for populating your new field. In our example, we will add our list of territories:
Part II: Add a New Field (UDF) to Sage:
-
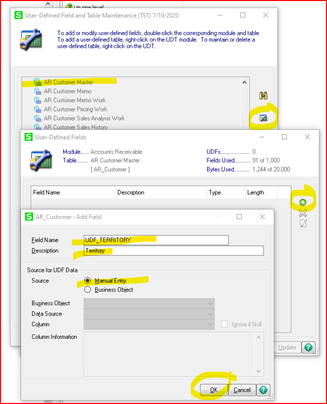
- Return to User Defined Field and Table Maintenance and select the table to which you’ll be adding your field.
- Highlight the table and click the “Edit Fields” button.
- Click the “+” button
- Enter a name for your new field
- Keep the “Manual Entry” radio button selected and click “OK.”
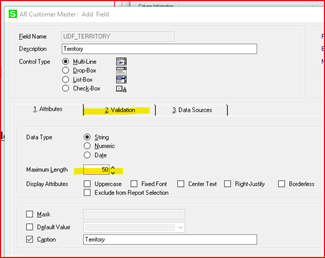
- In the next screen, enter the same field length as you did for the UDT “Key” in step number 2 under the section “Creating A Table (UDT).” Then, click the “Validation” tab.
- Next, select the radio button next to “User-Defined Table.”
- If you made your key and UDF the same length, you should see your table available for selection. Select the table and click OK.
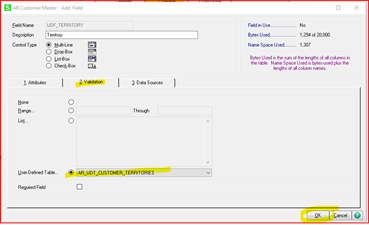
Click OK, then OK again (to update the database) and then Close to return to the main menu.
Part III: Add Your New Field to the Screen
- Open the screen where you’d like to add your new field. In our case, that will be Customer Maintenance.
- Right click on the screen until you see a pop-up menu with the “Panel Settings” option.
- Select “Customizer.” (Alternatively, you can open Customizer from Custom Office>Main>Customizer Selection.)Note that you will need role security permissions to access “Customizer.”
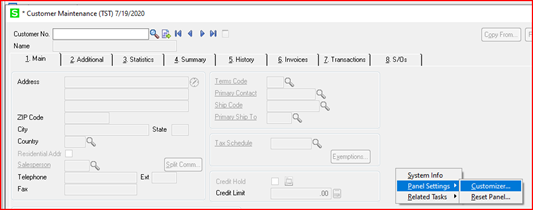
- From the next screen you will have the option of creating a new custom screen (aka “Panel”) or modifying an existing one (if any already have been created previously).
Note that custom panels may be created for all users and all companies, or specific users and/or specific companies.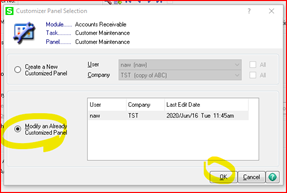
- Next, click the “Add Field” button and select your new UDF from the list that appears.
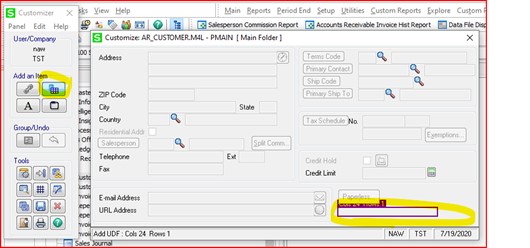
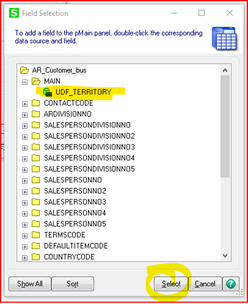
- Close the Customizer screen and save your changes when prompted.
And that’s it! No coding necessary. Just be sure to cover the 3 components when creating your own custom field with a lookup.


