
Sage 300 Newsletter – March 2017
Keeping You Up-To-Date With Information About Sage 300
Sage Intelligence Reports – Hiding Rows Based on Values
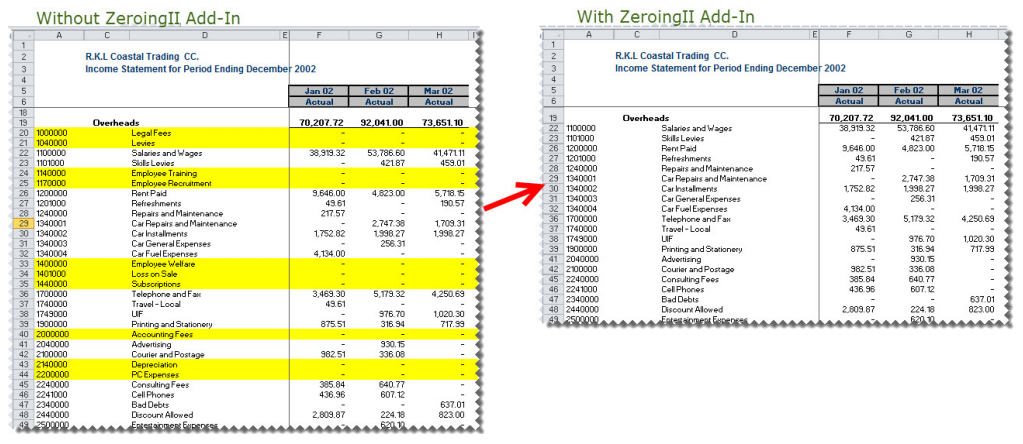
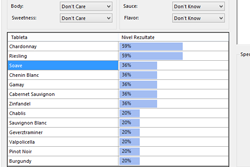 Hiding rows with zero amounts is a common need for producing professional financial reports. Financial Reporter made life simple with its ability to use values in cells to indicate if zero amounts should be hidden. Since Sage Intelligence and the Financial Report Designer utilize Excel Template files, you now have many options on how to ride rows. However, there are challenges when hiding rows based on values since most of the time we do not wish to have these rows permanently hidden after saving our report templates.
The best practice to hide your rows in Sage Intelligence is to use the Zeroingll Add-In Function. The power of this add-in over other options is that it automatically hides rows every time the report runs. The add-in also allows you to unhide any previously hidden rows before applying the action to the report. This saves you from manually updating and unhiding rows that may not have had values in the report’s previous run.
Updating Your Reports
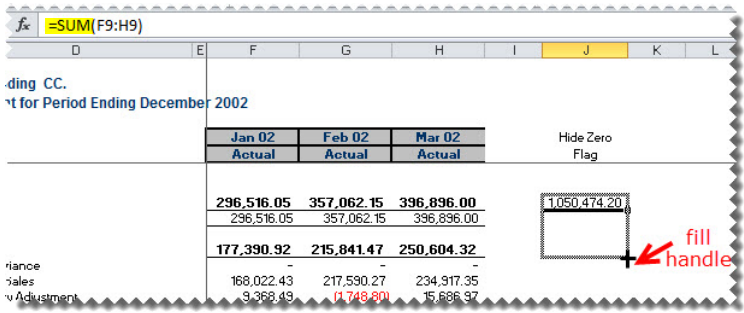
You will need to update your report depending on how you desire the hidden row functionality to display. For hiding zero values, an additional column is typically added to reports. The new column totals the row values to ensure only rows having zero values in all columns will be hidden. Any row that you would like to remain for formatting purposes can receive an “X” instead of the SUM() formula. Hiding the new column will allow you to maintain your desired format.
Setting the Zeroingll Add-In Function
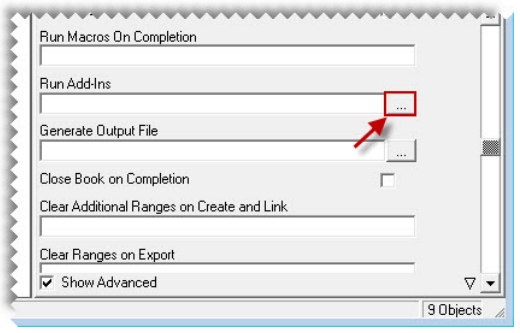
When you open the report manager and select the desired report, you will want to check/enable the Show Advanced checkbox at the bottom of the Properties tab. From this screen you will click the ellipses button for Run Add-Ins.
A new window will appear to select add-ins. Follow the steps below:
- Add-In Library: Alchemex Add-in 1
- Add-In Library Module: General Excel extensions Module
- Add-In Function: Zeroingll
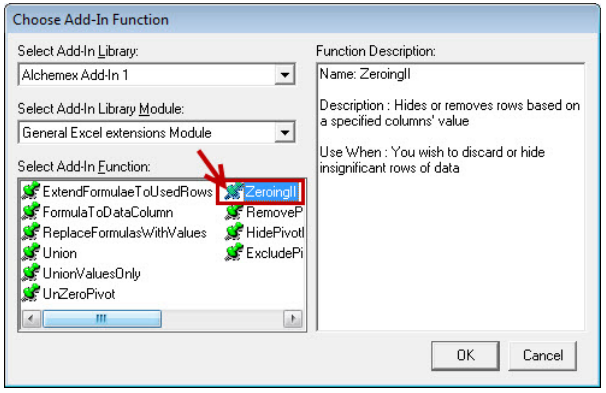
You can select to fill in the default values, which will populate the fields similar to the picture below. Once the default values are set, you can change the worksheet name (Sheet to Zero out Rows on), the column to confirm if 0 – or another specified value – is present (Column to Check), and the Value to Check.
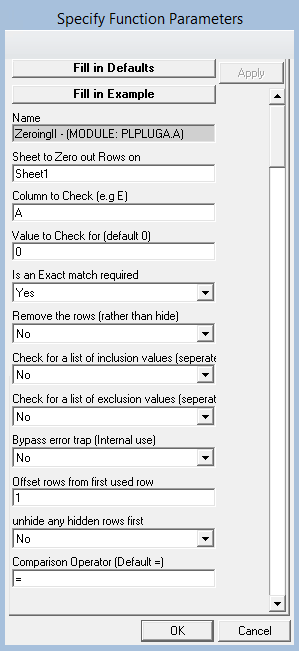
Please note, you will want to set the “unhide any hidden rows first” field to Yes. This ensures any previously hidden rows will be visible if the values are no longer zero. This setting will allow you to make updates and save your template without needing to unhide all rows during the save process.
![]()
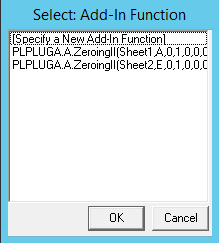
If you need to apply the function to multiple sheets in the report, you will need to repeat the process of adding the Add-in to every sheet. You will select the Add-In Ellipses and then select (Specify a New Add-In Function. You will follow the same process as before, but you will specify a different worksheet name and likely a different Column to Check. The screenshot below shows two sheets applying the Add-In (Sheet1 and Sheet2) for columns A and E respectively.
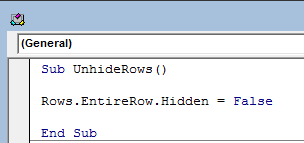
If you want the option to unhide all hidden rows while you have the results in excel. You can add a simple macro to the workbook (make certain your template is macro-enabled). The picture below shows the code for a macro to unhide all hidden rows.
For the entire guide on using the Zeroingll Add-in, you may use this link.
For an additional method for hiding zero rows after a report has been generated use this link.
To stay up to date on the latest Sage 300 2016 news, visit Net at Work online!


