
Sage 300 Newsletter – September 2016
Keeping You Up-To-Date With Information About Sage 300
Sage 300 Bank Services – Best practices
Do you maintain a separate spreadsheet to track your bank balance? Do you record entries that affect the cash account in the general ledger? If you answered yes to either of these questions, the article will show you how the bank reconciliation application in Sage 300 Bank Services can save you time and provide look up without referring to spreadsheets.
The first order of business is to setup a bank account in Sage 300 via Common Services, Bank Services, Banks. You will need to add the bank code and associate it to the appropriate General Ledger account for Bank Account, Write-Off Account and Credit Card Charges Account.
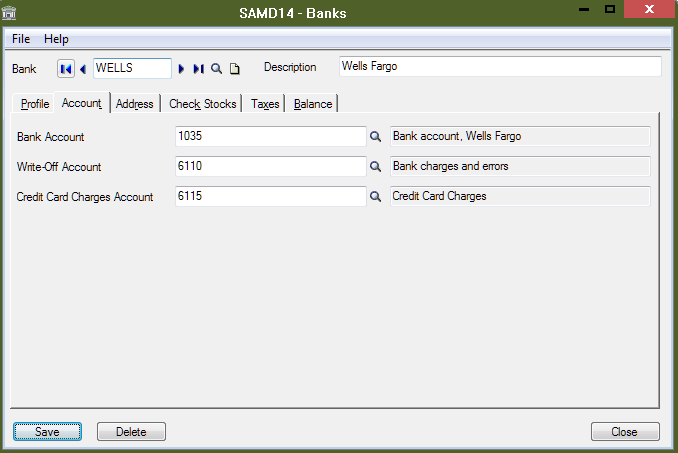
If you will be printing or writing checks from this account, the check stock code will also need to be added.
After the bank code has been added, the next step is to ensure that you have a current bank statement that has been reconciled to your general ledger bank account. We usually recommend selecting the end of the prior month.
Select Common Services, Bank Services, Bank Transactions, Reconcile Statements. Type in the bank code that will be reconciled.
In our example, the bank account code is WELLS. The manual reconciliation was done using a spreadsheet where there are $2,500.00 in outstanding deposits and $4,722.10 in outstanding withdrawals. We will need to update the bank reconciliation to reflect these outstanding transactions without updating the general ledger balances as the entries were done via journal entries.
The bank statement ending balance from the bank is $55,079.35. The end goal is to make the Adjusted Statement Balance match the Book and GL Balance. The print screen below reflects the initial statement balance and GL balance.
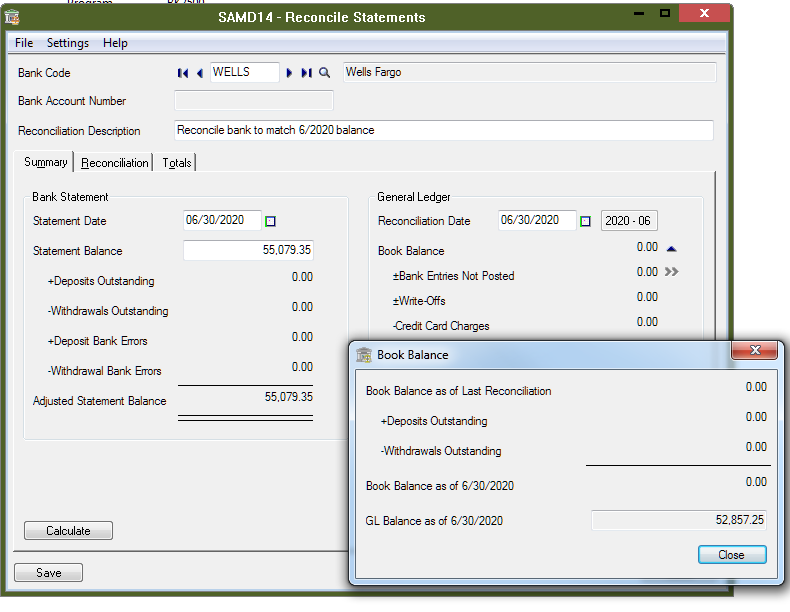
In order to update the outstanding deposits and outstanding withdrawals separate entries can be made. An extra entry will be made to update the book balance. The steps are as follows:
- Select Common Services, Bank Services, Bank Transactions, Bank Entry
- Tab to the description field and type a meaningful description
- Type the bank code and/or use the Finder to locate the bank code
- Ensure that the Bank Entry Type is Deposits
- Select the appropriate deposit type from the drop-down
- Type the date of the deposit
- In the detail area, enter the GL account associated to the bank code
- Type the amount of the deposit
- Type a meaningful description in both the Reference and Description fields
- Add
- Repeat steps 1-10 for each outstanding deposit
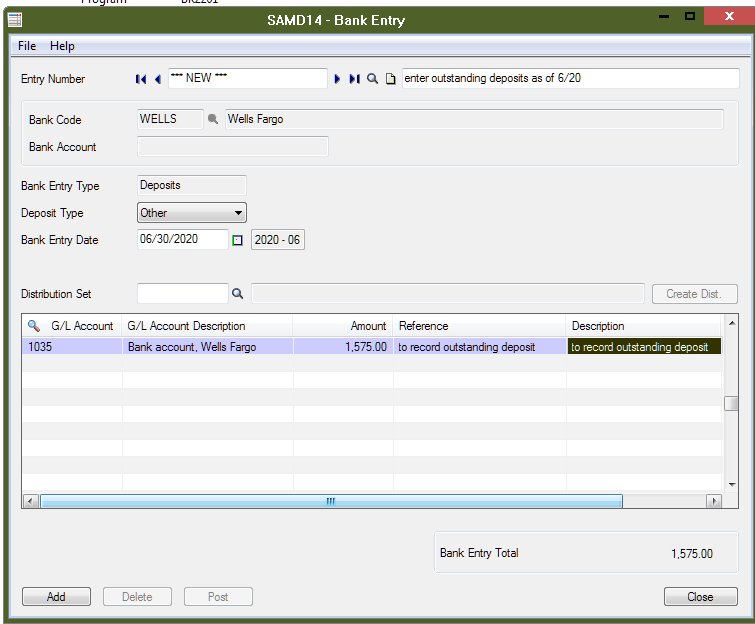
To enter the outstanding withdrawals, the steps are similar:
- Select Common Services, Bank Services, Bank Transactions, Bank Entry
- Tab to the description field and type a meaningful description
- Type the bank code and/or use the Finder to locate the bank code
- Ensure that the Bank Entry Type is Withdrawals
- Select the appropriate Withdrawal type from the drop-down
- Type the date of the Withdrawal
- In the detail area, enter the GL account associated to the bank code
- Type the amount of the withdrawal
- Type a meaningful description in both the Reference and Description fields (type the check number if this is an outstanding check)
- Add
- Repeat steps 1-10 for each outstanding withdrawal
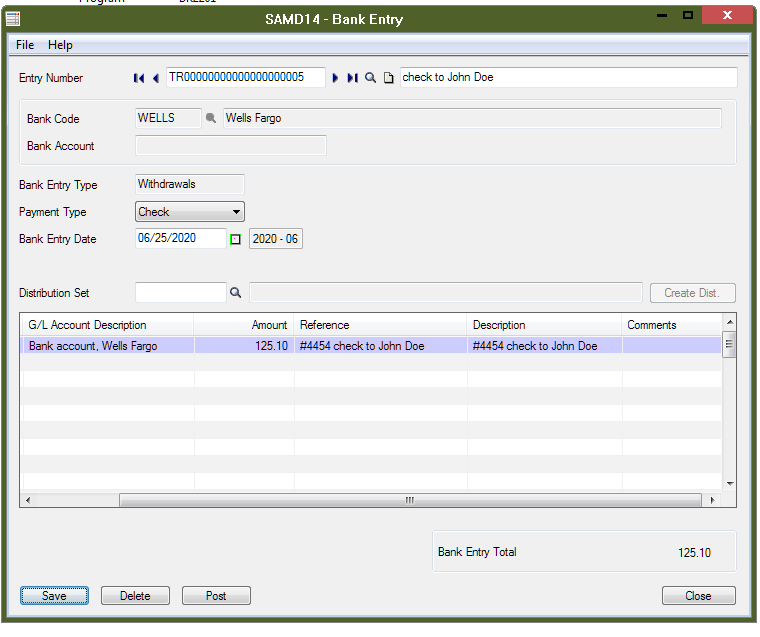
One last entry must be done in order for the Book Balance to match the GL Cash balance. In our example, the GL Balance is $52,857.25. We have entered outstanding deposits totaling $2,500.00 and outstanding withdrawals totaling $4,722.10. The difference is $55,079.35. To update the book balance, we will repeat the steps used to enter a deposit. An example is below:
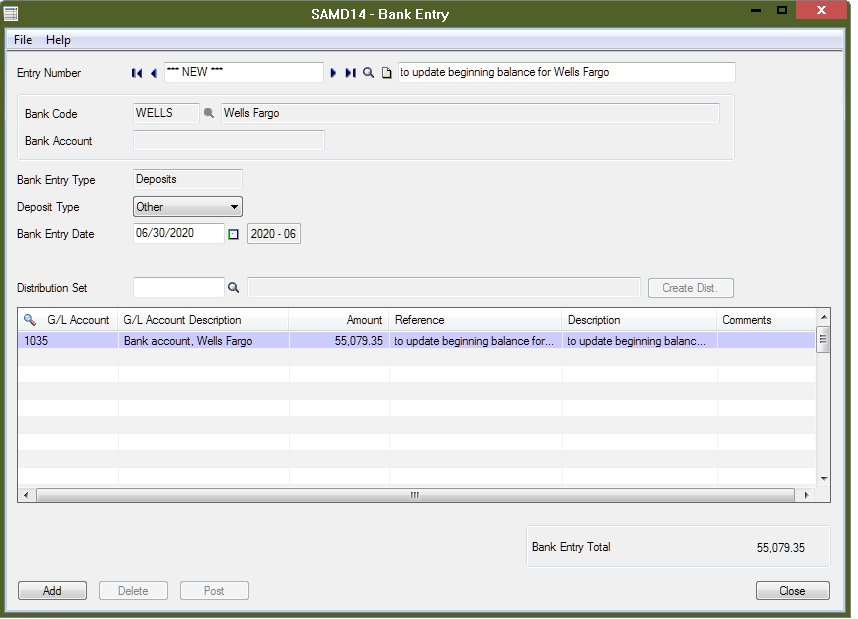
After this entry has been added, all of the entries must be posted to update the book balance. This is done by:
Selecting Common Services, Bank Services, Bank Transactions, Post Entries
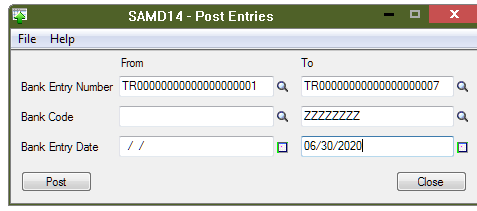
Let’s go look at the bank reconciliation screen after the entries have been posted:
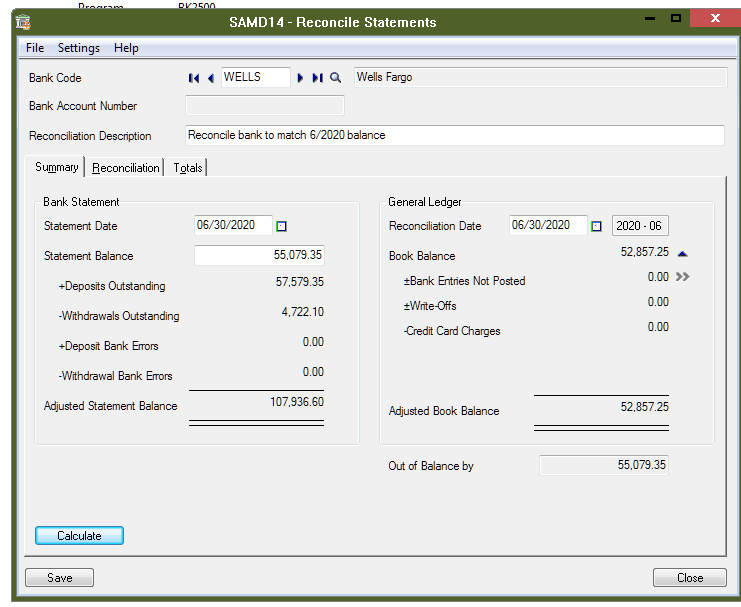
In order to clean up/zero out the “Out of Balance by” we will need to clear the bank entry made to update the opening Book Balance:
Click on the Reconciliation tab. Double-click in the field labeled Reconciled on the row where the Bank entry had been made. An “X” will appear and the Out of Balance by at the bottom of the screen will be 0.00.
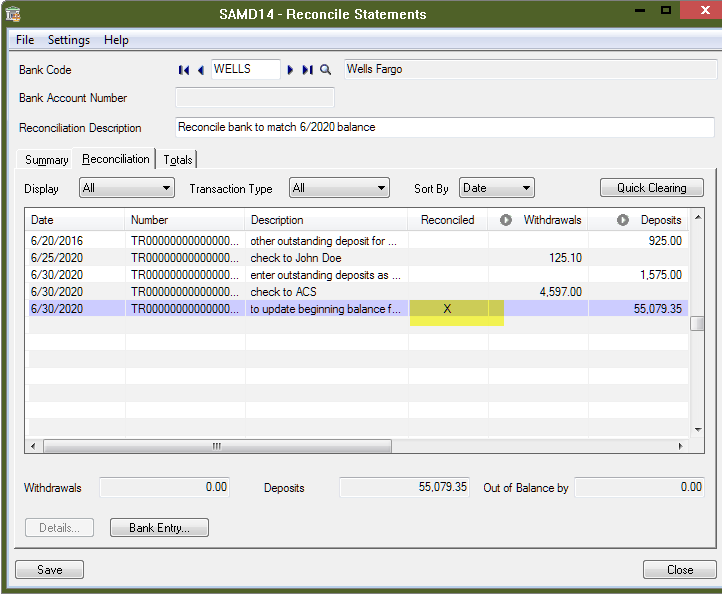
Select the Summary tab to review the Statement Balance, Deposits Outstanding, Withdrawals Outstanding, Adjusted Statement Balance and Adjusted Book Balance.
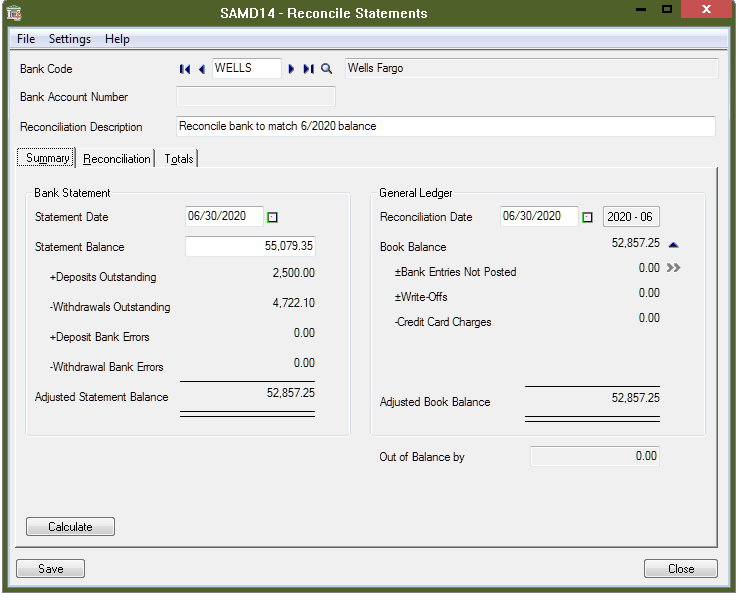
Select Save to save this reconciliation. Close the screen.
The last step is to post the Reconciliation. Go to Common Services, Bank Services, Bank Transactions, Post Reconciliation.
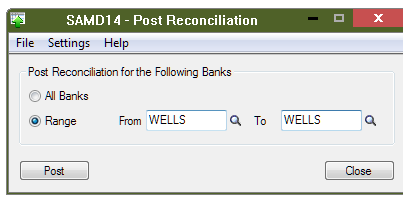
The post process will update the bank balance and create a batch for the general ledger. Because the cash account was used for the entries, you can either delete the batch in General Ledger or Post it as the end result will not affect the cash account balance.
In order for the book balance to stay in synch with the General Ledger balance, do NOT post any journal entries to the cash account. All entries that will affect the bank should come into bank services via Accounts Payable, Accounts Receivable, Payroll or a bank entry.
In summary, getting the bank reconciliation to match the general ledger balance can ultimately save a lot of time after tying it out the first time. Give us a call or send us an e-mail if you would like to ditch the spreadsheet(s)!


